What’s Your Stance? Demystifying The Art Of Setting Up Your Snowboard Bindings.
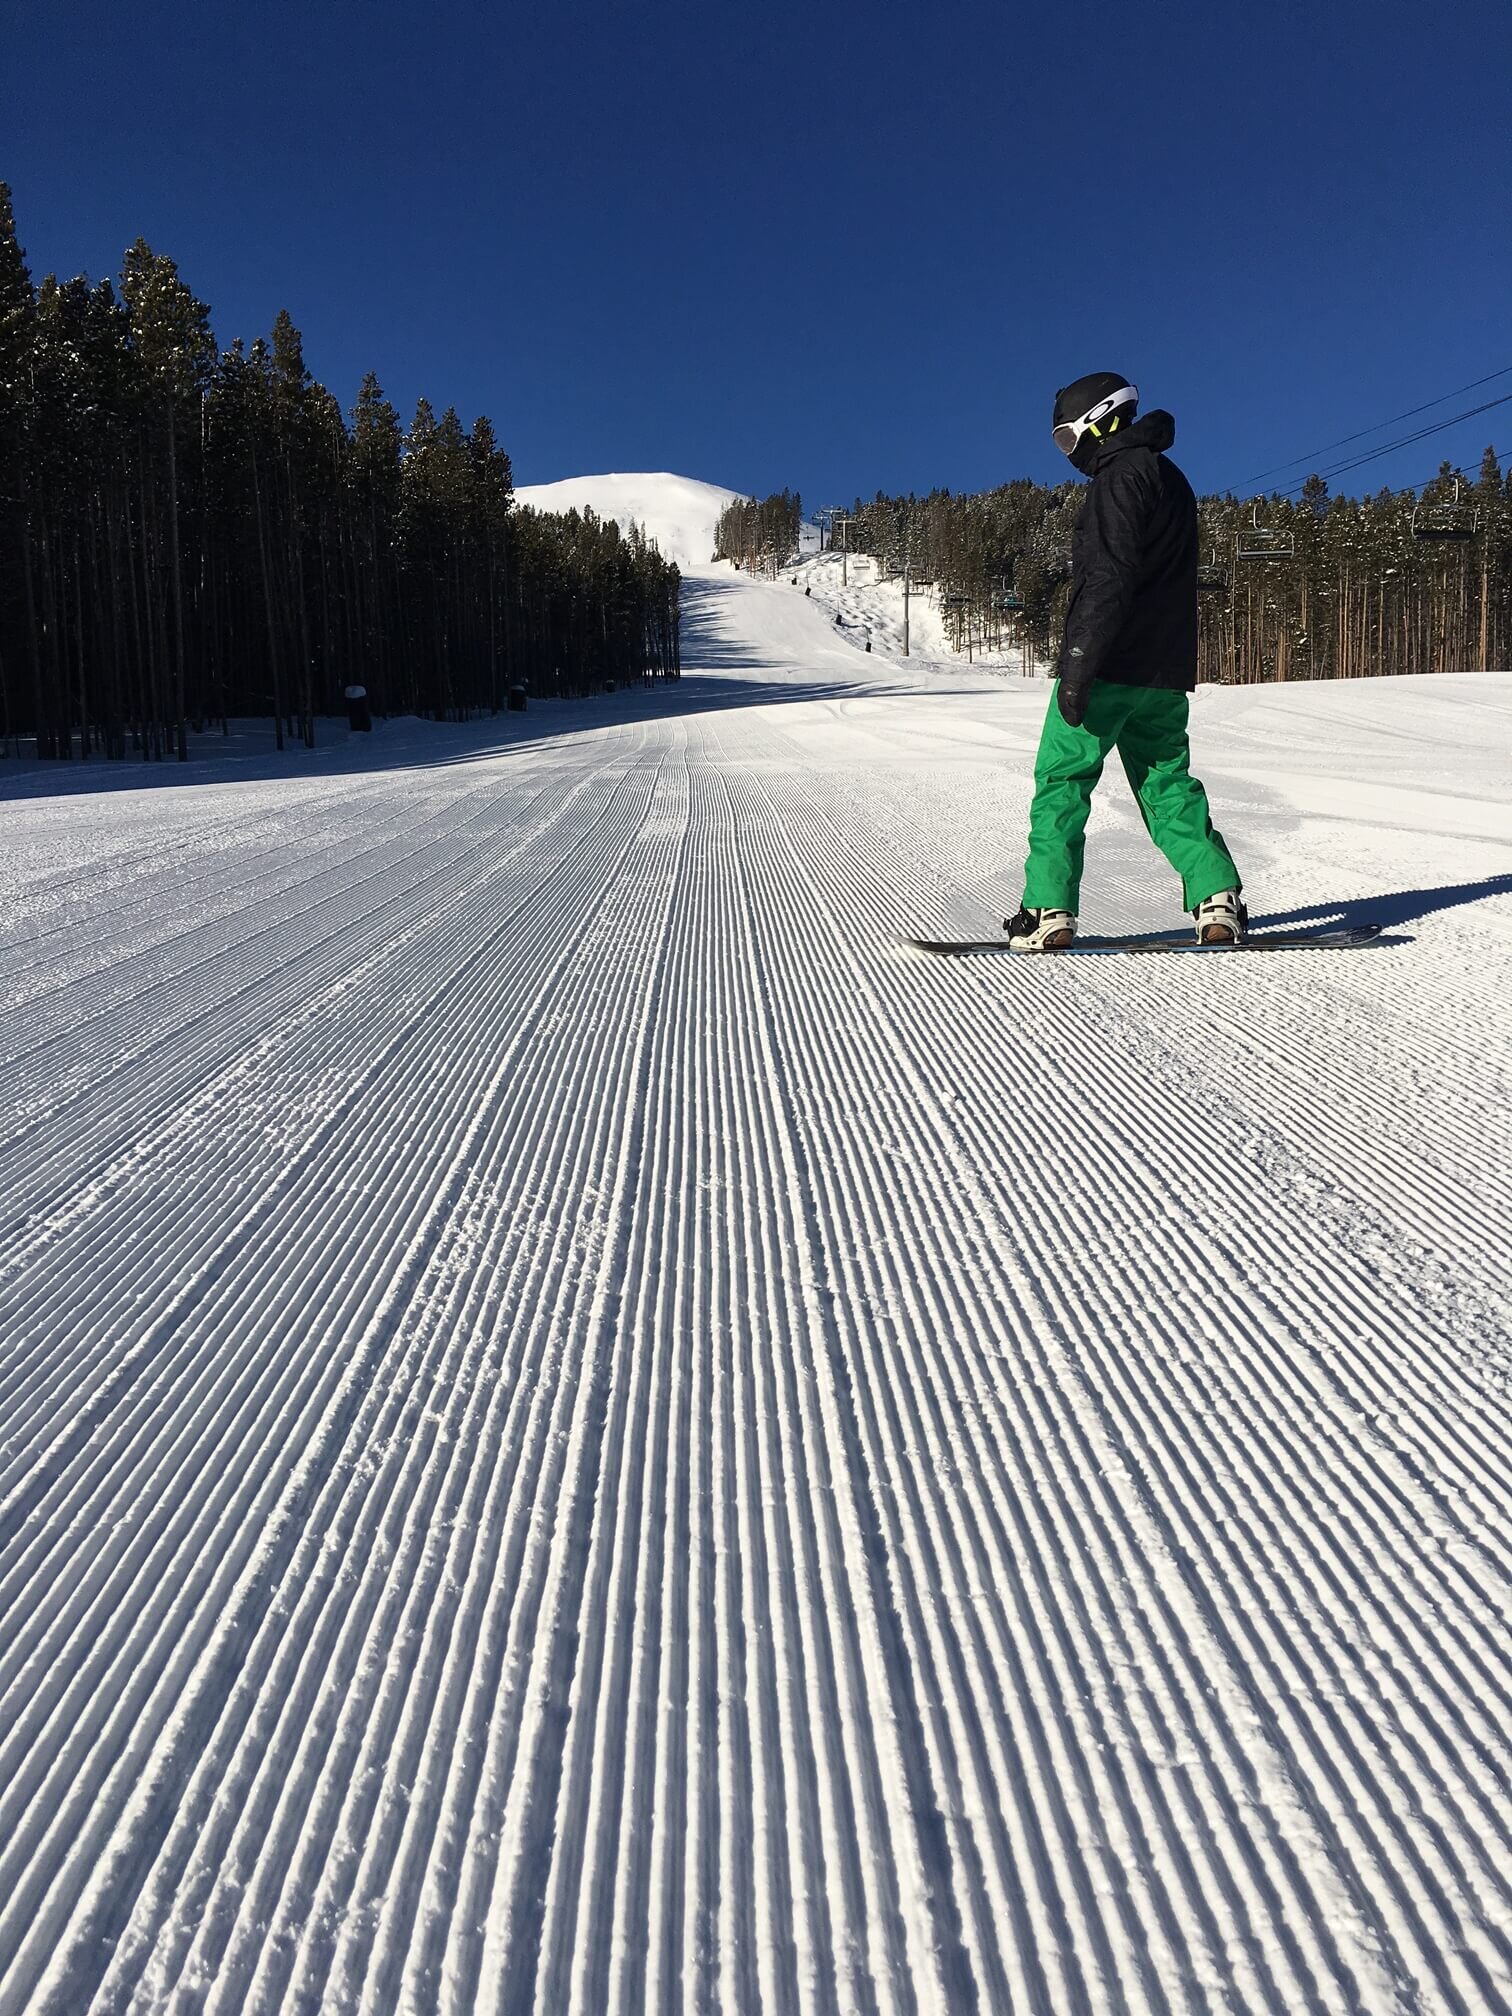
The first time you jumped on a snowboard, the rental staff most likely set up your bindings based on their experience with beginners. And with so much going on in those first few days, you probably didn’t even think about the angles of your bindings or where they were positioned on your board.
However, tweaking your bindings to suit your riding or conditions can make quite a bit of difference to your fun factor. And as your ability improves, you may want to make changes to increase responsiveness. A little investment in time to understand snowboard binding settings and then applying those changes will pay dividends by providing years of enjoyable riding.
There is no definite right or wrong way to set up your bindings (well maybe riding pigeon-toed!) so don’t be afraid to play around. What may work for someone else may not feel right for you. And that’s fine – ride with whatever gives you the most confidence and fun.
A note on tweaking. With quite a few adjustments available, I kept a log in a spreadsheet when I started out. I would make an adjustment and record how it would affect my riding. It may seem a little anal but it’s a nice reference tool to have, especially setting up your board again at the beginning of each season. I also felt by recording my adjustments, I wasn’t scared to try something radical to see what the impact was – I could always reference my spreadsheet and go back to a previous setting I was happy with.
Settings I would record would be:
Stance width.
Front binding angle.
Rear binding angle.
How far the front binding was from the front of the board and how far the rear binding was from the rear.
Further to the above, the setback (if any).
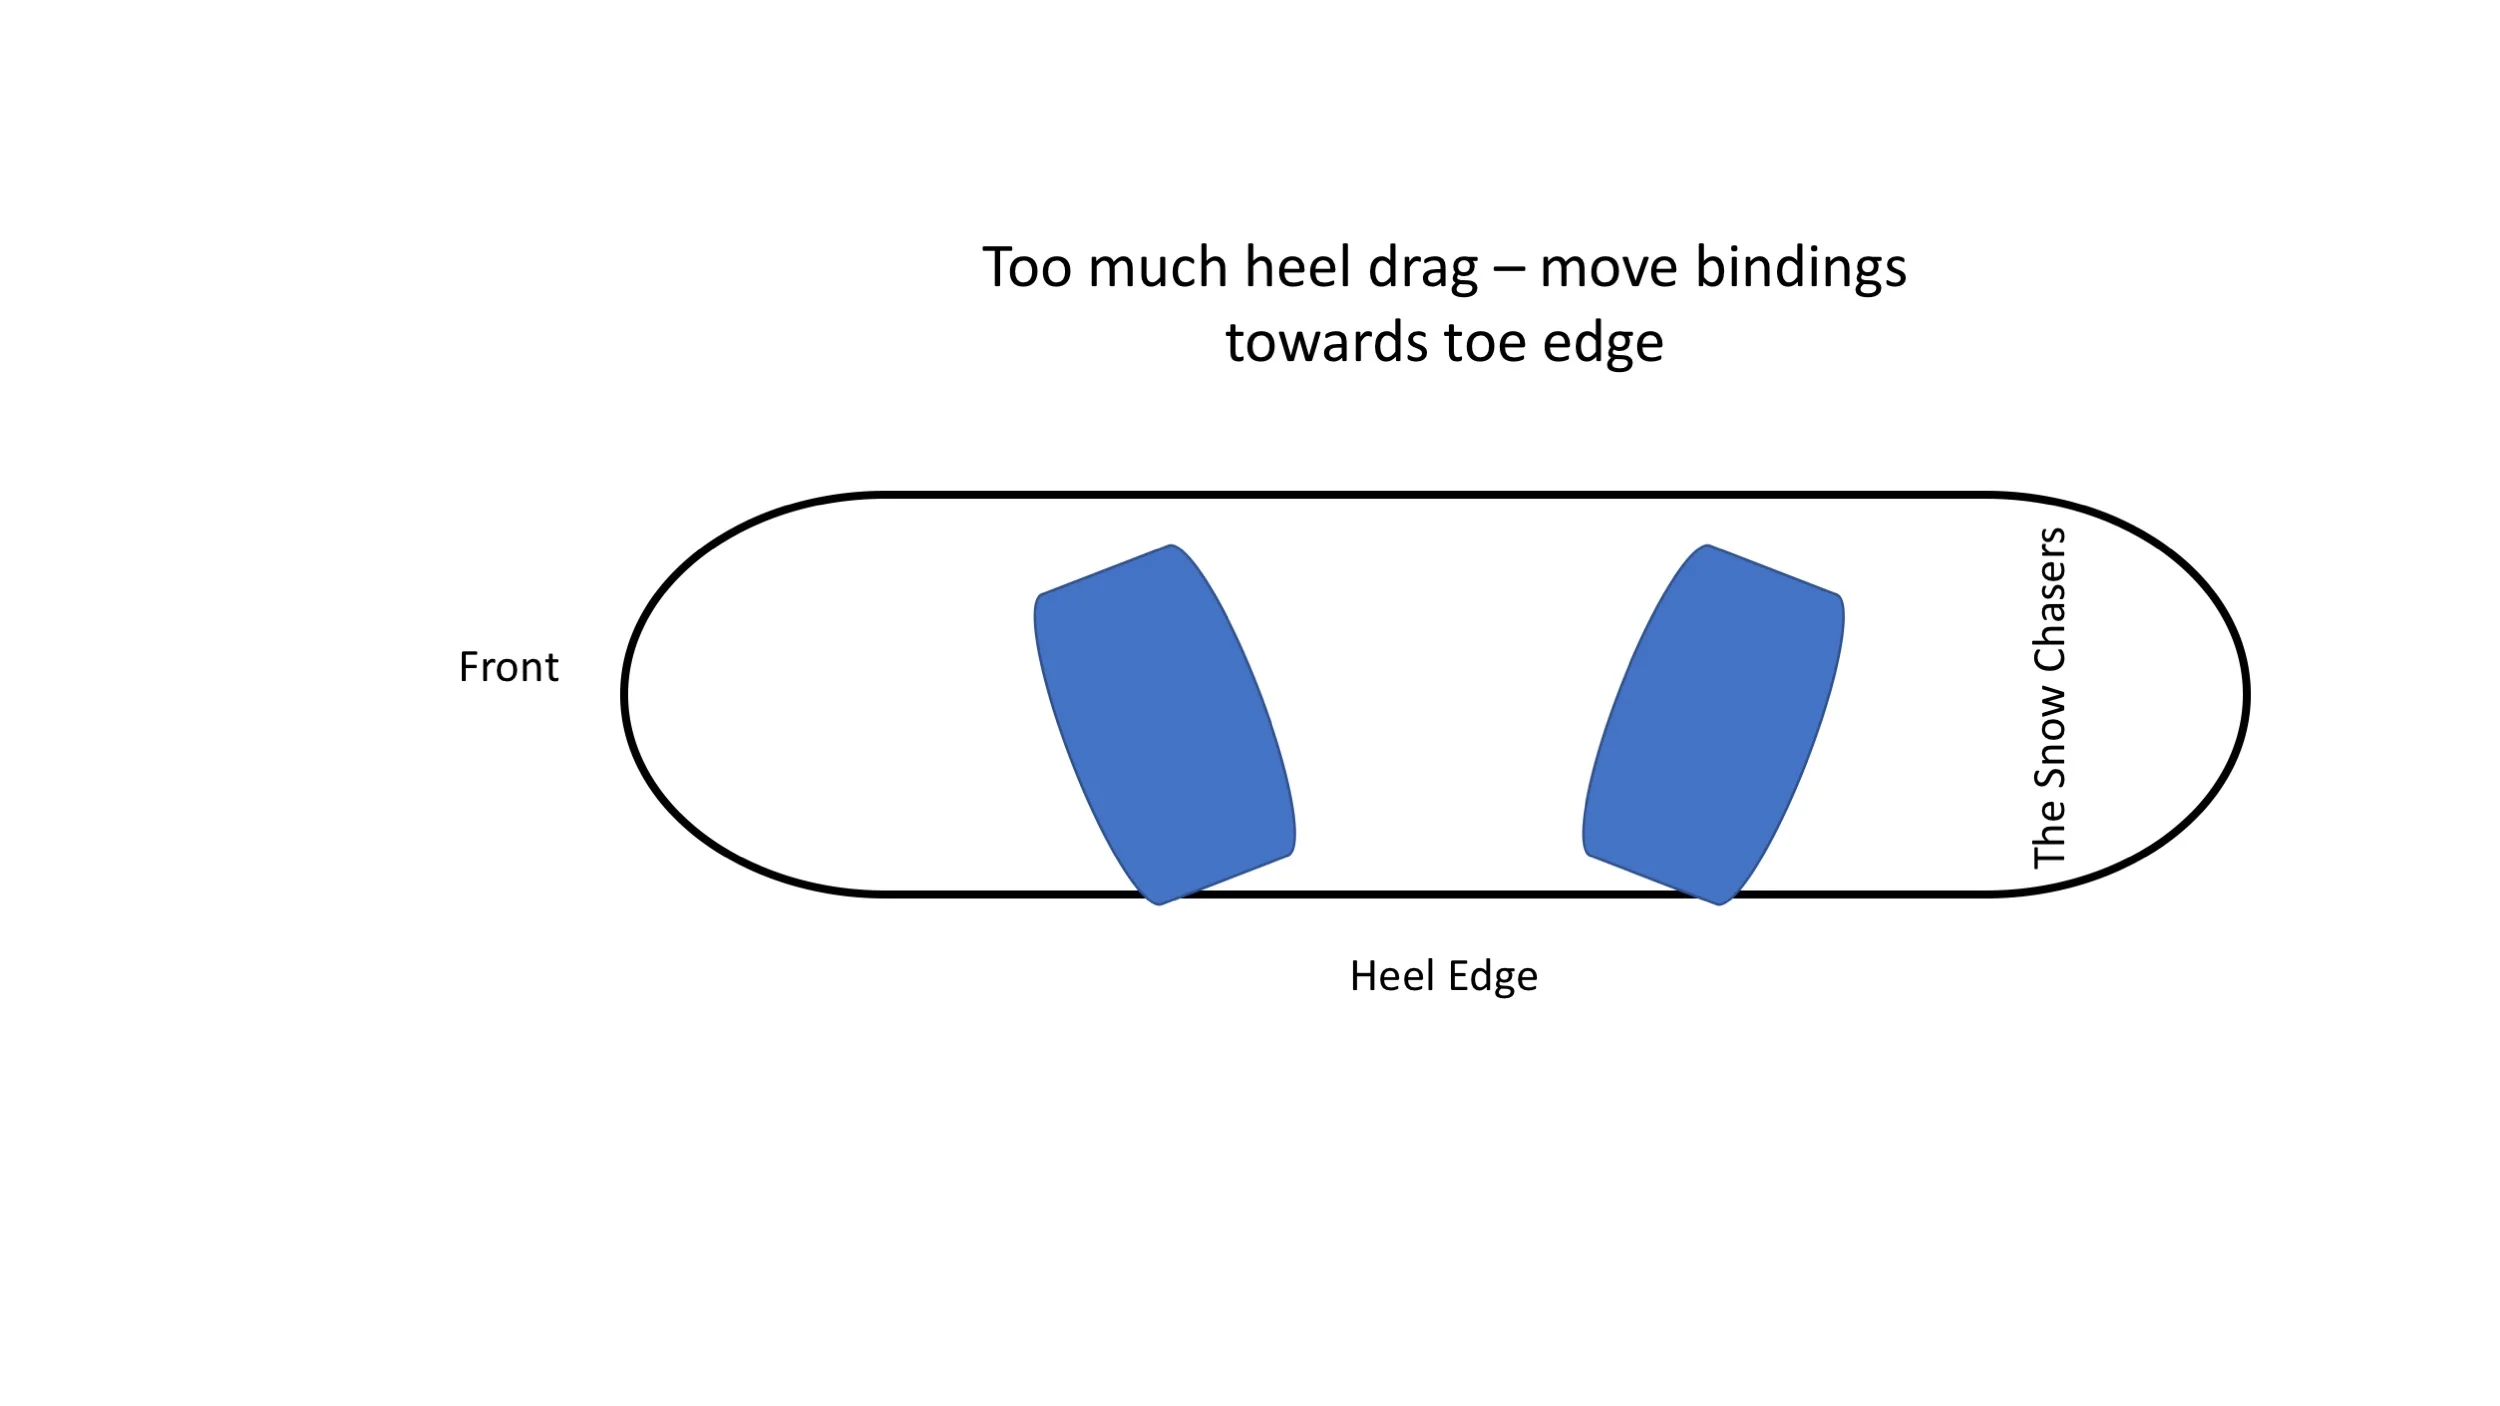
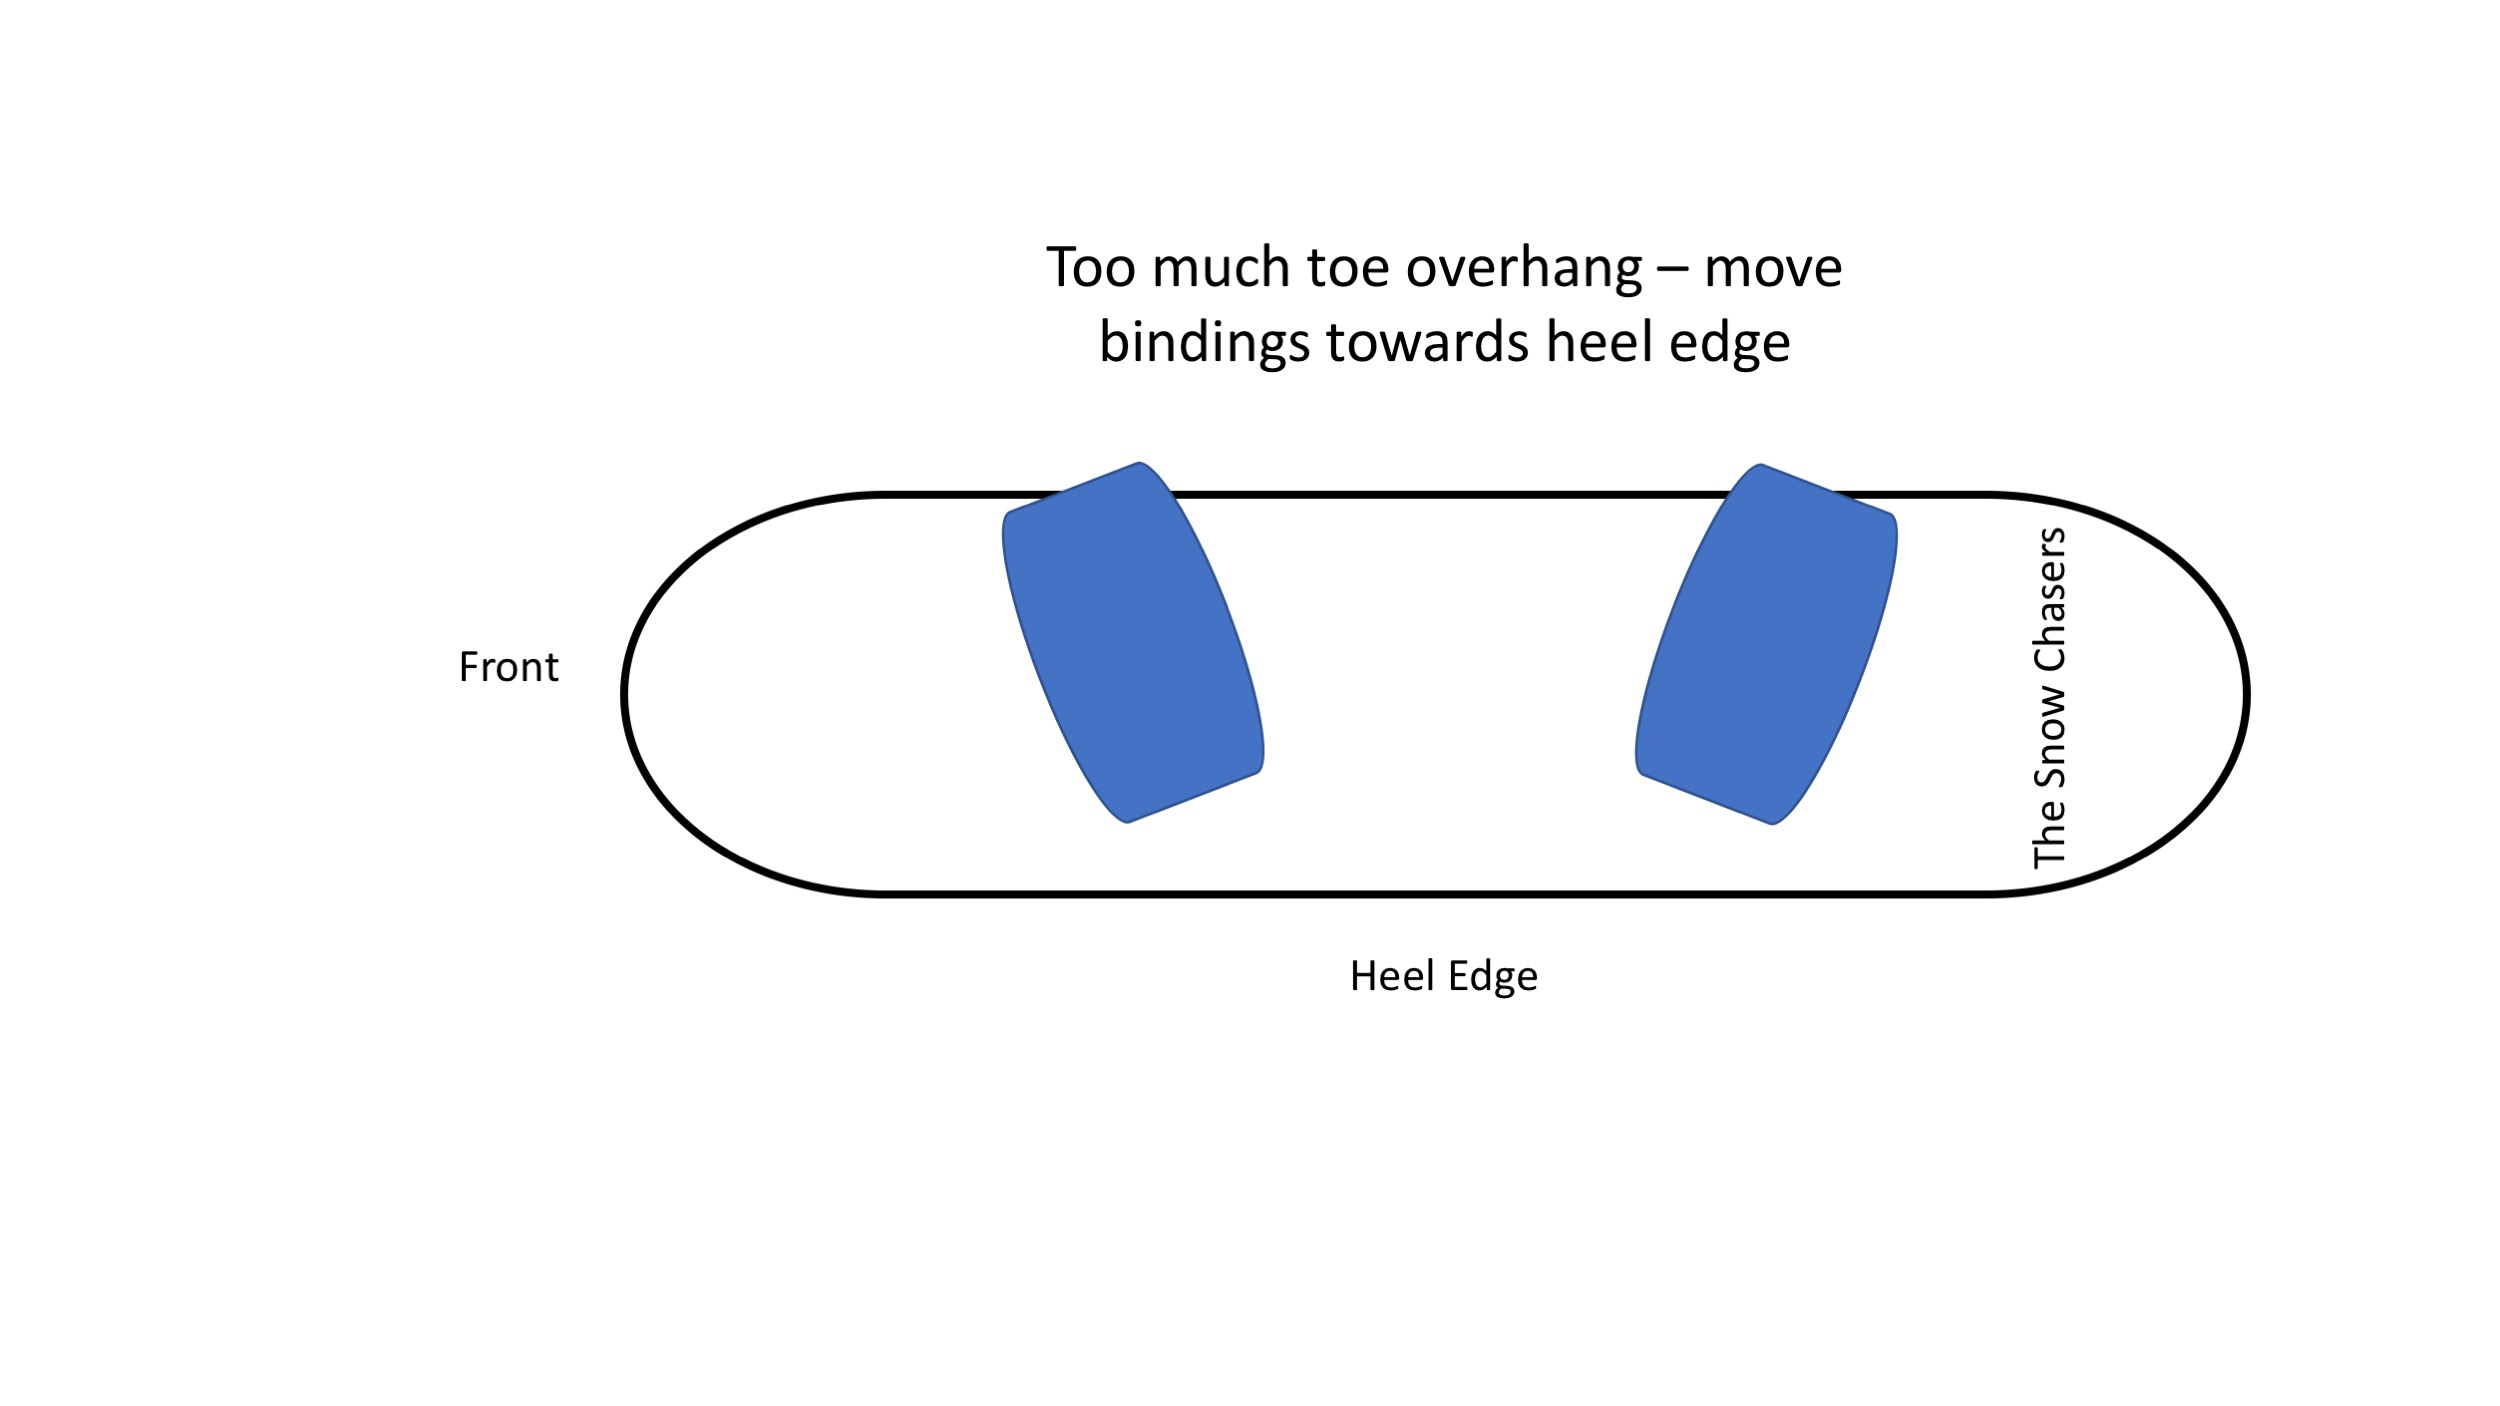
Binding position relative to the toe and heel side edge, e.g. if I had too much toe drag, I would position the binding further towards the heel edge to see how that would feel.
High back angle.
Setting it all up
Are you Regular or Goofy? Common ways to determine this are:
When you slide across the floor with your socks on, which foot is forward? Left = Regular, Right = Goofy.
If you’re pushed from behind, which foot comes out first? As above, if it’s the left then you’re regular and vice versa.
If you’ve skateboarded or surfed before, you’ll know as it will directly translate.
How far apart should your bindings be, i.e. stance width?
The recommended starting point is shoulder width.
A narrower stance may be good for carving but you’ll lose stability, especially over rough terrain and you won’t feel comfortable on jumps.
A wider stance will feel more ‘planted’ and stable but may sacrifice your carving.
My personal experience has led me to a wider than shoulder width stance. Why? After experimenting, I found too narrow a stance reduced my ability to squat down over the rough terrain, mainly because I have limited ankle flexibility.
Stance Position – centred or set back?
Your stance is where you, or more accurately your bindings, are positioned on the board relative to the front and rear of the board.
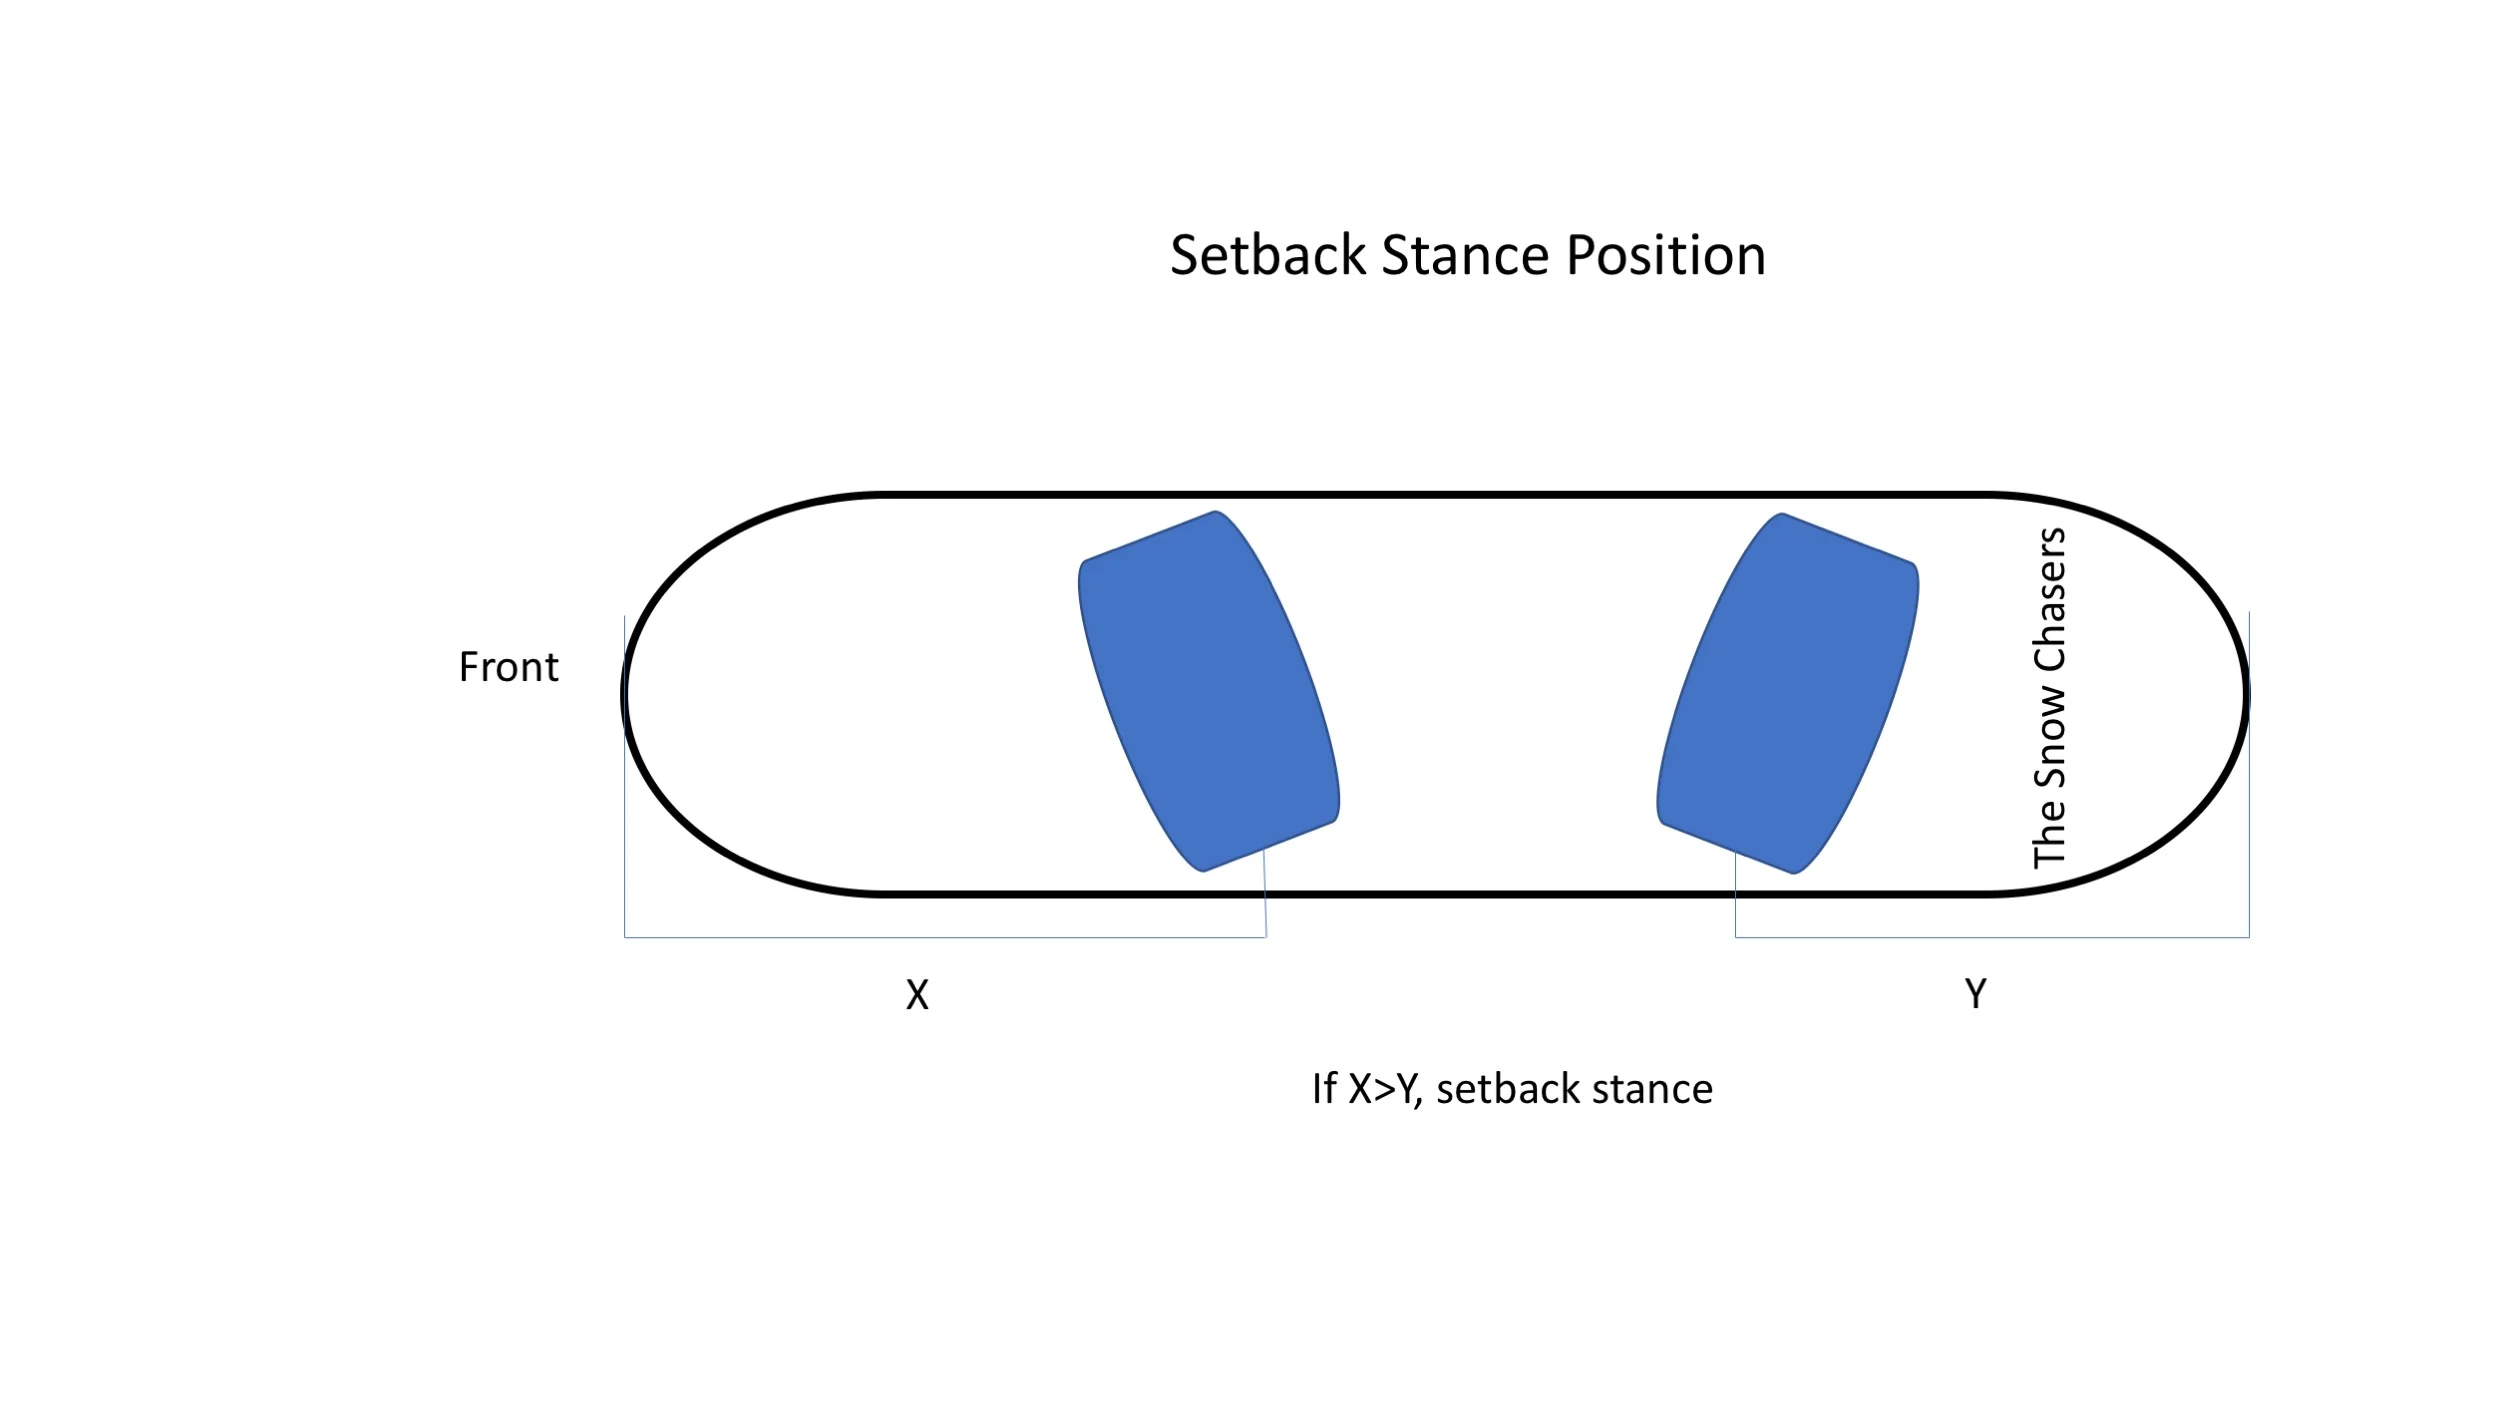
If your bindings are centred, your front binding is the same distance from the front of the board as your rear binding is from the rear of the board.
If you have a ‘setback’ stance, as the name suggests, the bindings are set back towards the rear of the board, i.e. now the distance from the front of the board to the front binding is larger than the distance from the rear binding to the rear of the board.
For all mountain, park, and freestyle, usually a centred stance is preferred.
For powder, it’s always a good idea to move the bindings back or increase the setback a little, especially important if you’re riding a true twin (see below). This allows the nose to float, reducing the nose digging in and alleviating some of the pressure you need to place on the back leg.
Some boards are directional as opposed to a true-twin (with a true-twin board, the binding holes are equal distance from the front and rear of the board). Directional boards will have a little setback dialled in, even though your bindings are centred over the binding holes on the board.
Binding Position relative to toe and heel side edge
You may find it beneficial to move the binding toward or away from the toe/heel edge depending how much overhang your toe or heel has.
While not wearing your boots, strap them into the bindings and take a look at the boots – do they look centred relative to the edges?
If you have too much toe drag or overhang, move the bindings towards the heel edge and vice versa.
Most base plates will allow for this adjustment.
Binding angles
The ‘standard’ rental shop setup will be around +15 degrees front binding and 0 (neutral) to -3 degrees for the rear one. It’s a good starting point for smooth groomers.
Once your speed picks up and you start to tackle different terrain, different angles can make a big difference depending on the type of riding you’re doing. For example:
Fast groomers and carving – increase the front binding angle, keep rear binding neutral or even go a little positive. Going positive on the rear binding might be too much of a compromise for general all-mountain riding. For extreme examples, check out Olympic snowboard carvers – both feet pointing forward up to +60 degrees.
All mountain, off-piste and powder – experiment somewhere between +15 to 24 degrees on the front binding and neutral to -21 degrees on the rear.
Park and Freestyle – ‘Duck Stance’, i.e. front and rear binding angle equal and usually between +15 to 24 degrees on the front and -15 to 24 on the rear. Great if you ride a lot of switch. See diagram above.
Other factors to consider is how the angles feel on your knees, hips or body position. I once tweaked my back binding 3 degrees because my knee was getting sore and it made a world of difference.
Over the years, I found +21 degrees on the front and between -15 to 21 on the rear works best for me. It allows me to get low in my squat on the rough stuff, ride switch when I want to and still lets me carve on the groomers (better at -15 degrees on the rear).
High Back angle/forward lean
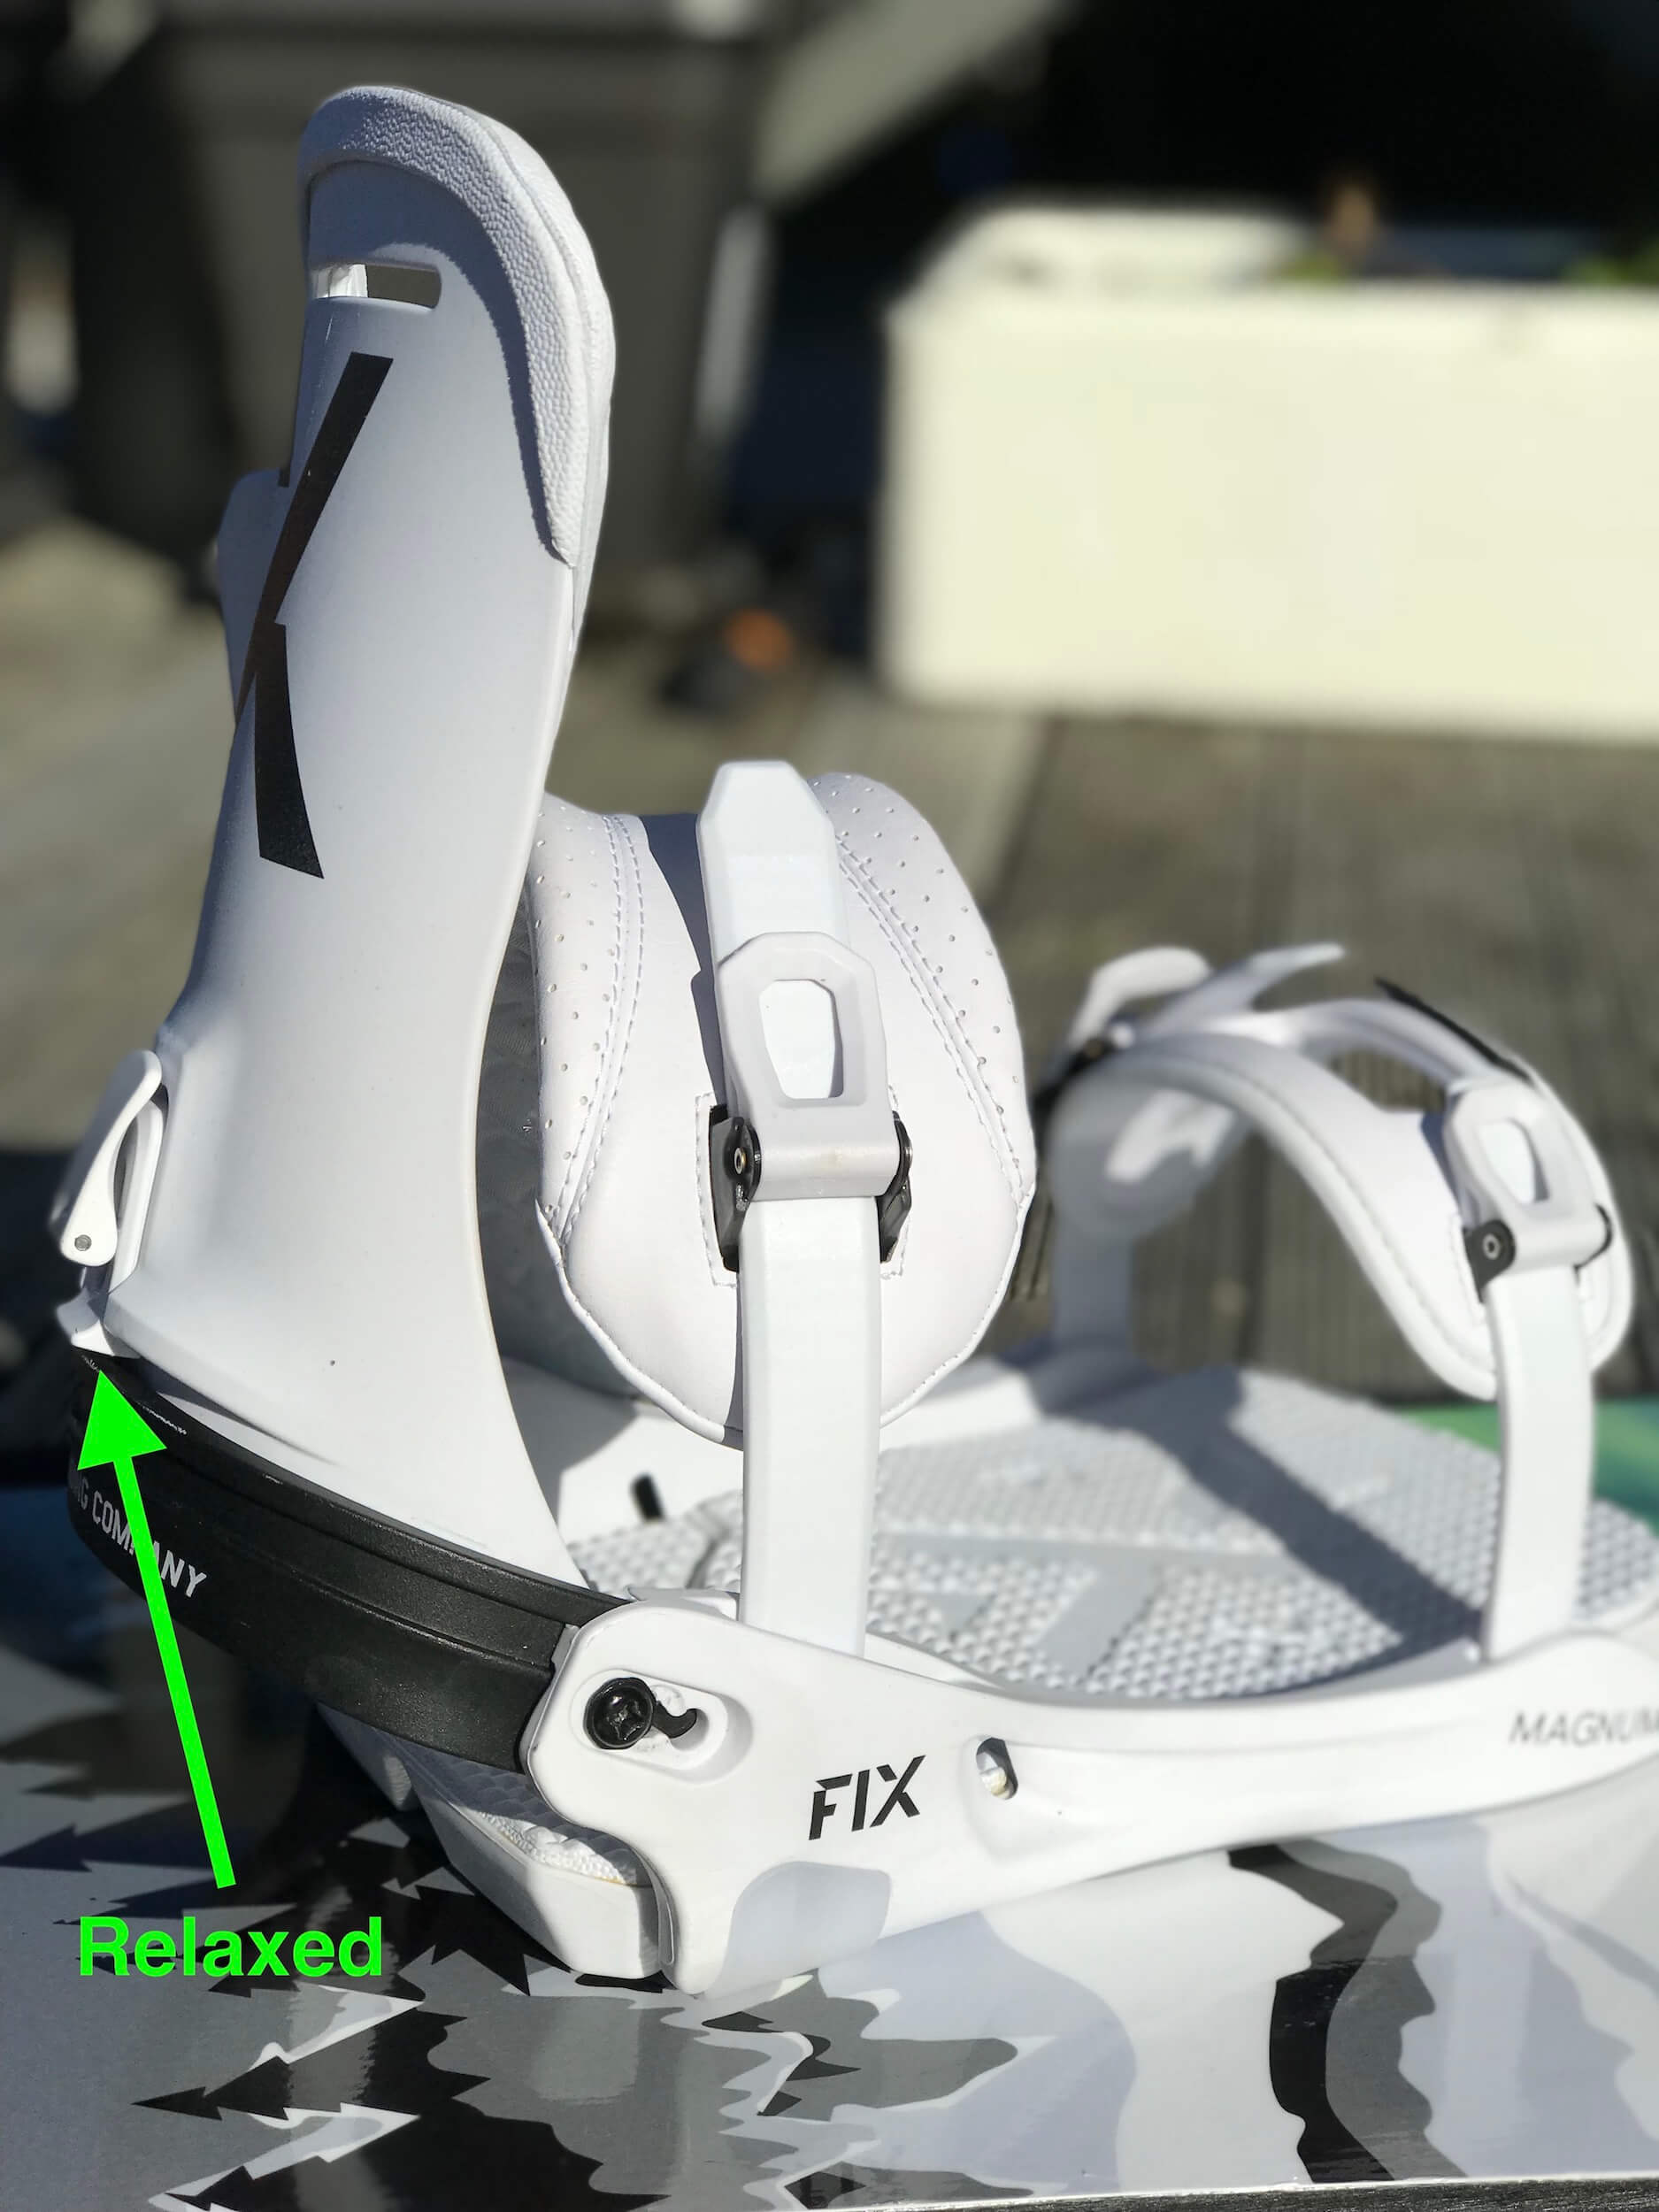
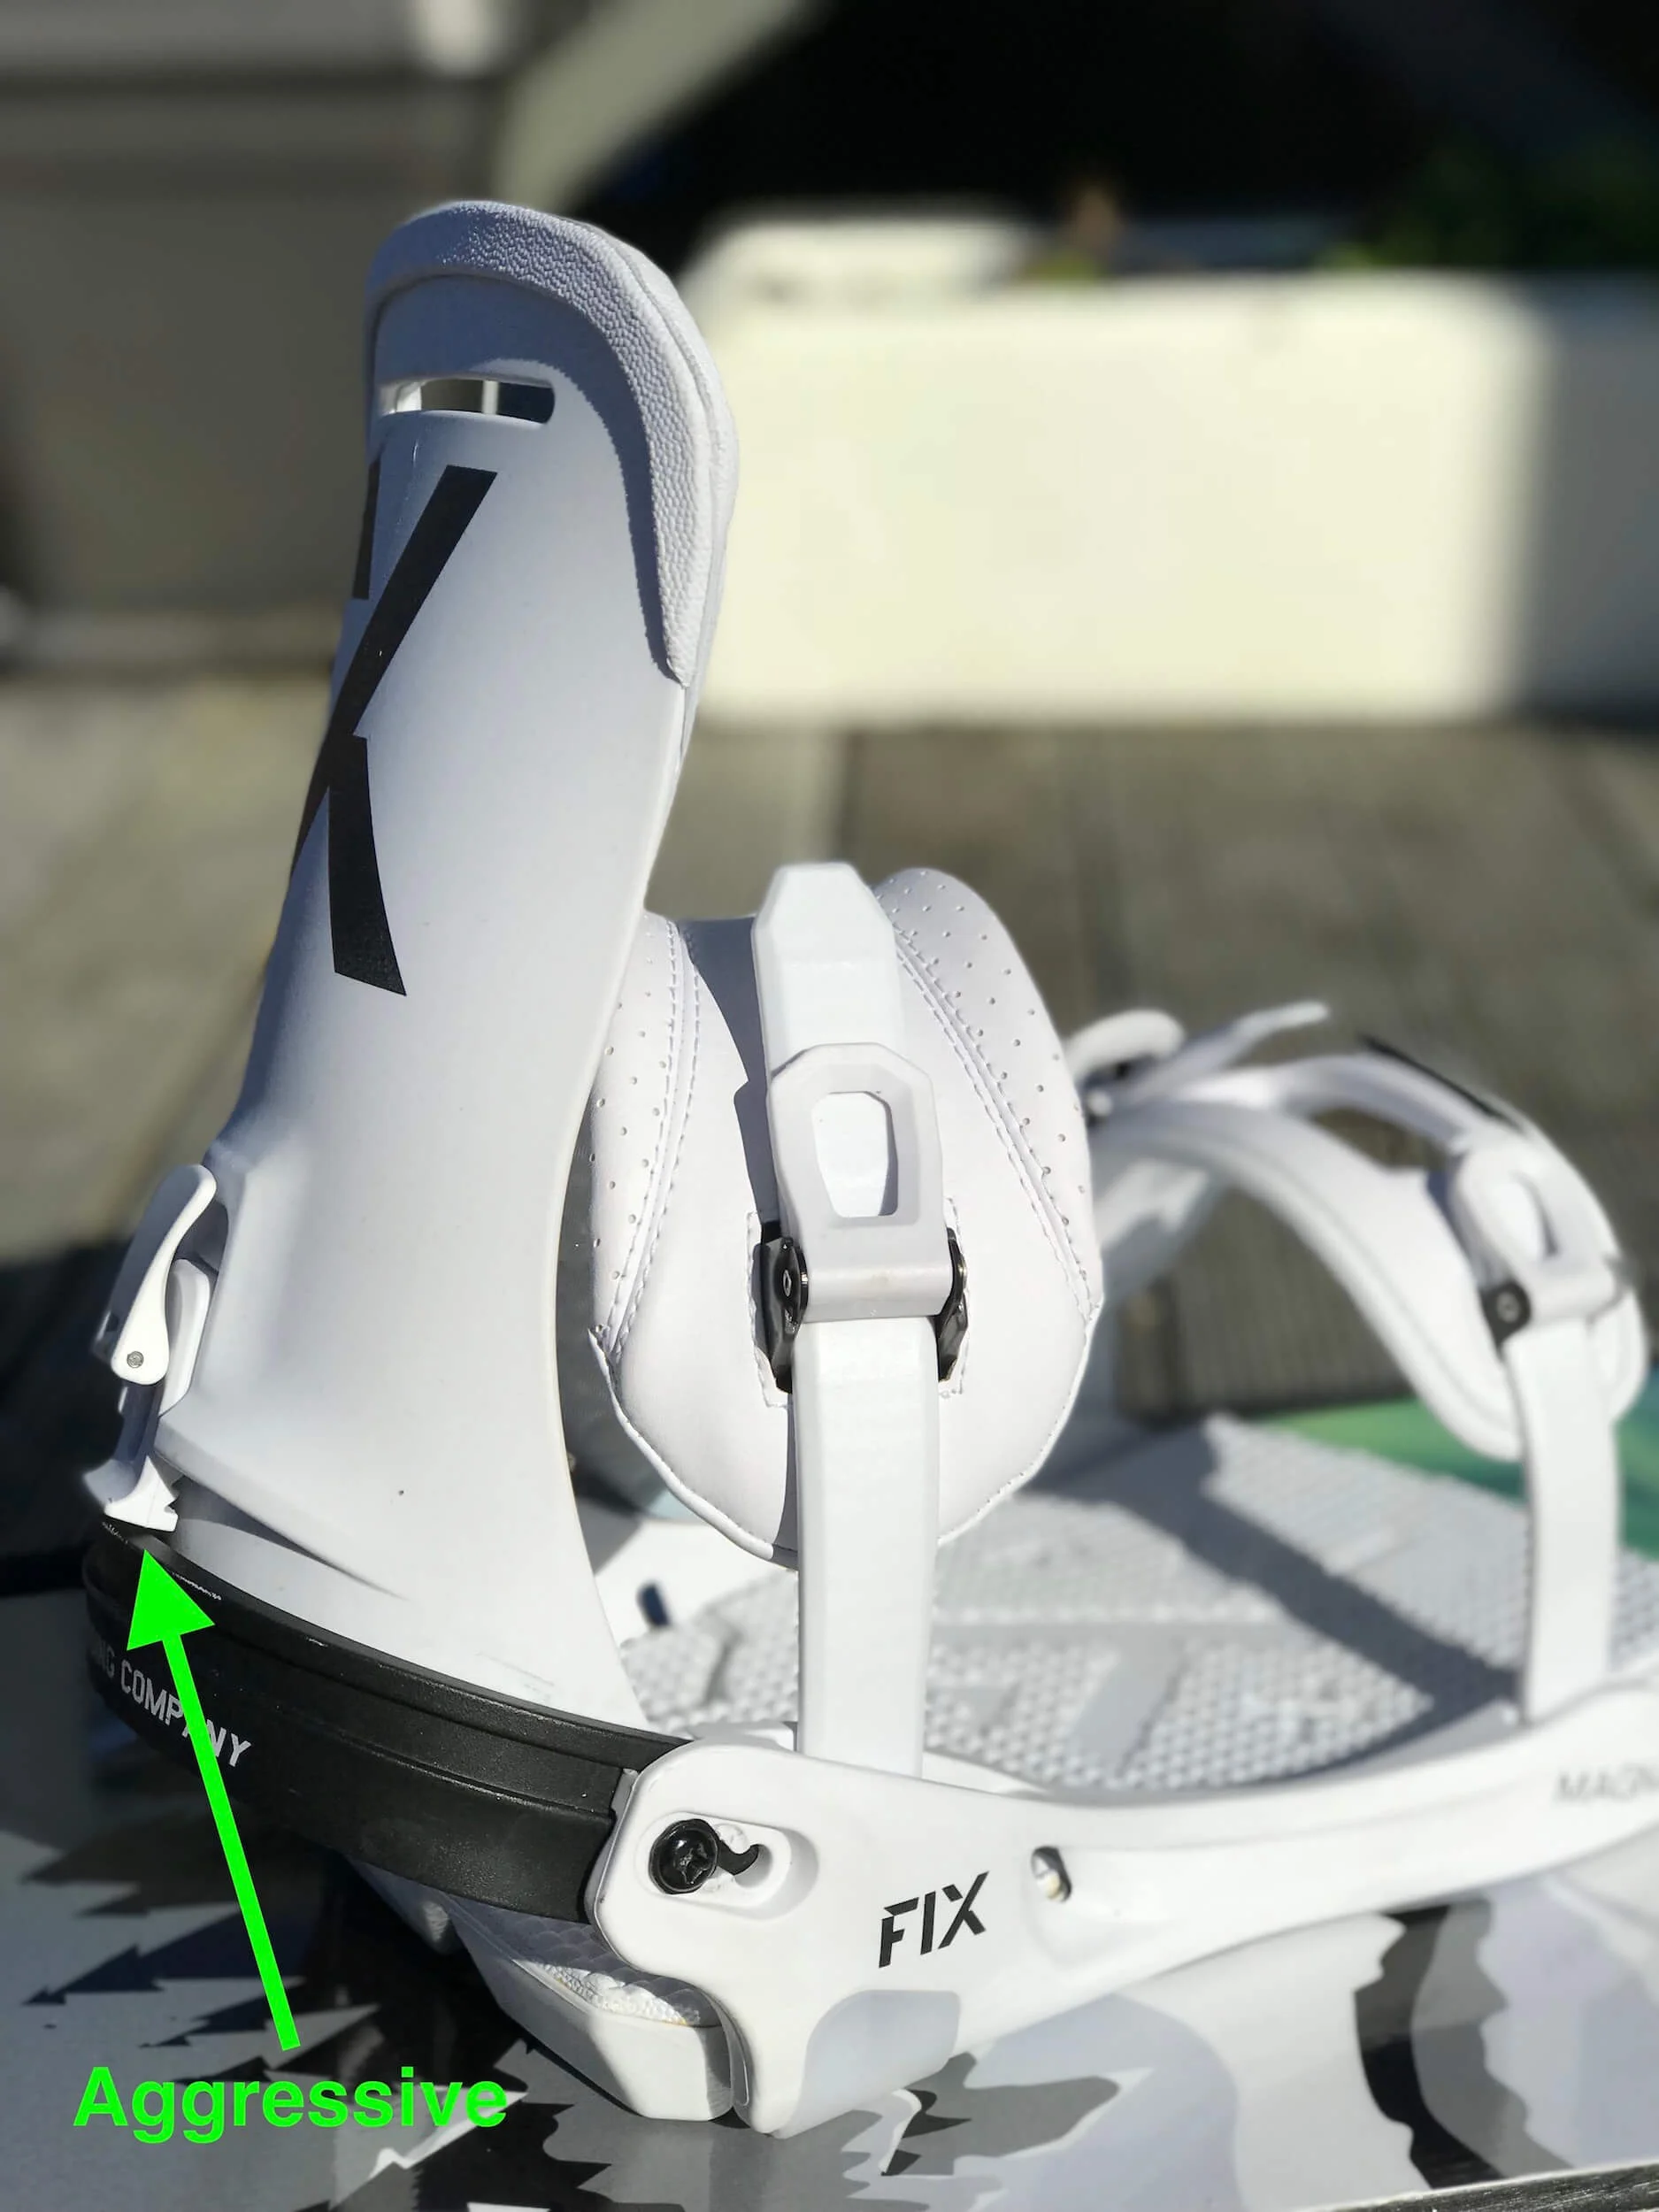
Tilting your high back towards the toe edge will improve responsiveness, especially getting on to your heel edge (Aggressive). Great for carving as any little movement of your boot directly transfers to your binding.
Having a slightly more upright position of your high back will dull down responsiveness a little (Relaxed). Great for playing around and freestyle as you don’t want every little body movement impacting your board.
Play around with having the high back just off your boot, on your boot and hard up against your boot (i.e. tilted quite far towards the toe edge) to see how this makes you feel and affects your riding. I like to ride with mine just touching but not too much pressure.
Aligning your high backs with the heel edge
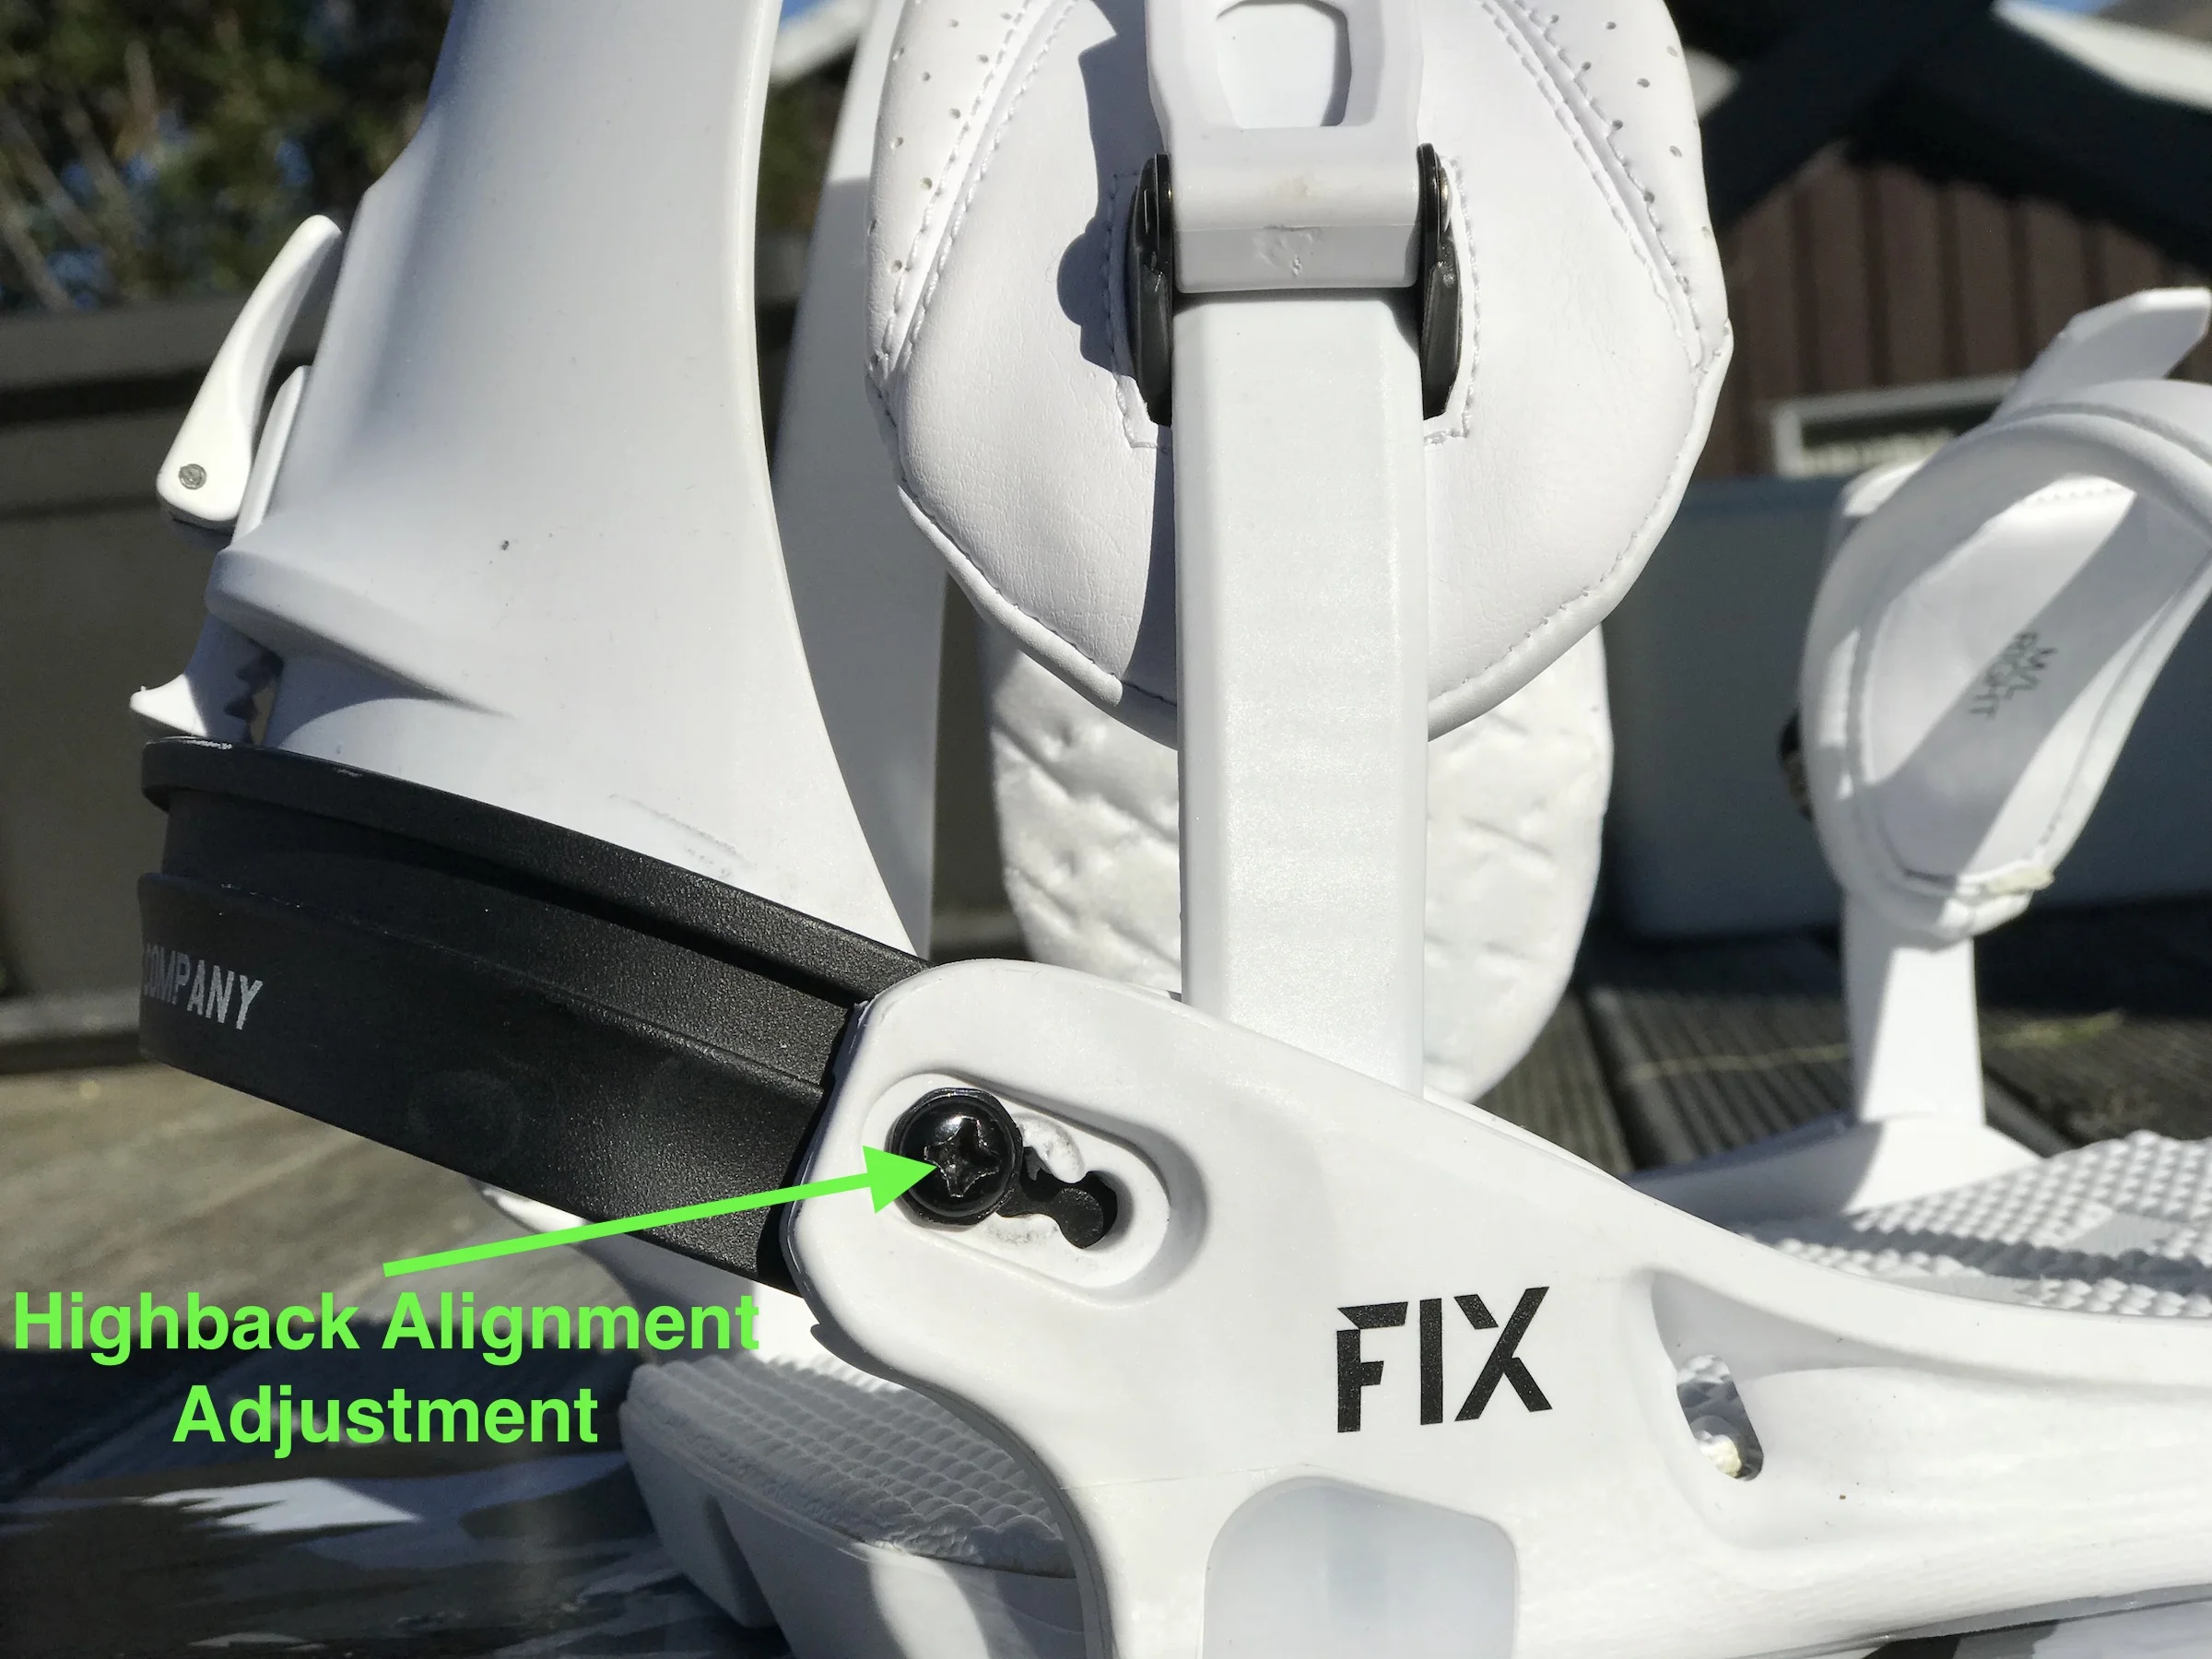
Aligning your high backs to run parallel to the heel edge will improve your comfort and responsiveness.
Most high backs will have three settings (first photo above) where they attach to the base plate.
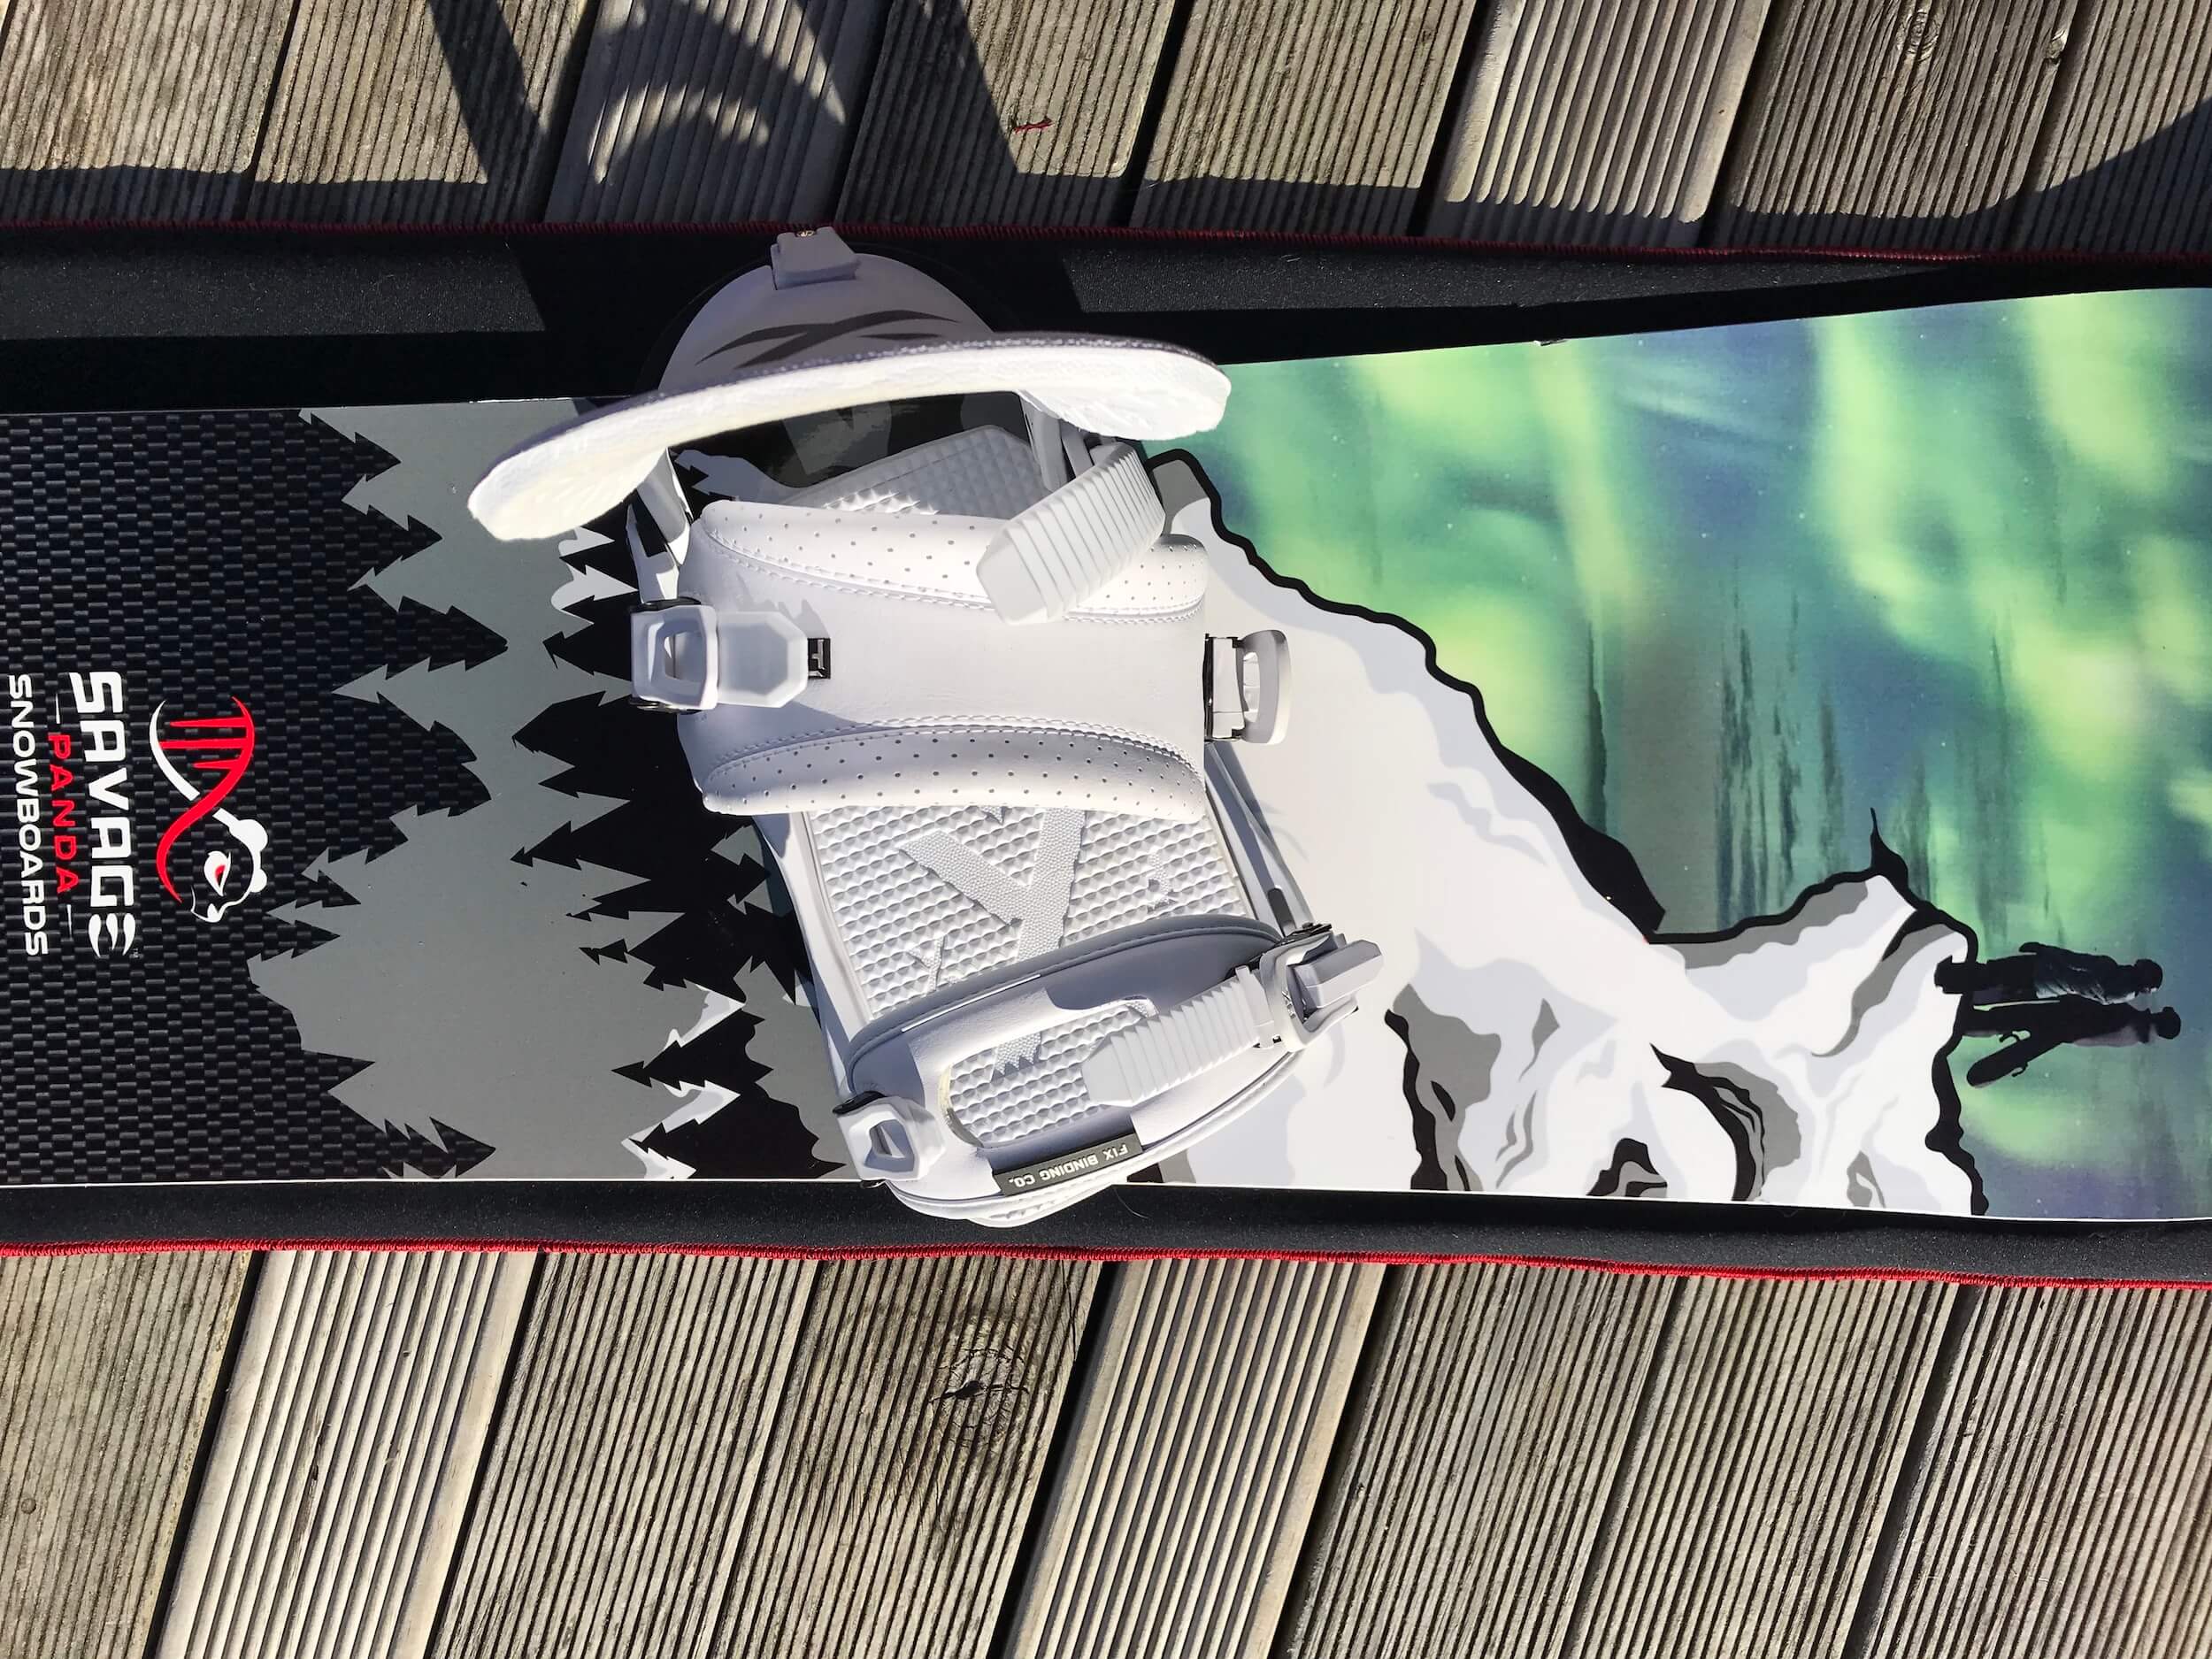
Align once you’ve set up your binding angles. On the second photo above, notice how the highback runs more-or-less parallel to the heel edge.
Adjustable Toe Pedal (part of the footbed that your toes rest on)
The majority of bindings have an extendable and retractable toe pedal.
Adjust to ensure the front of your boot aligns with the front of the pedal.
Cant
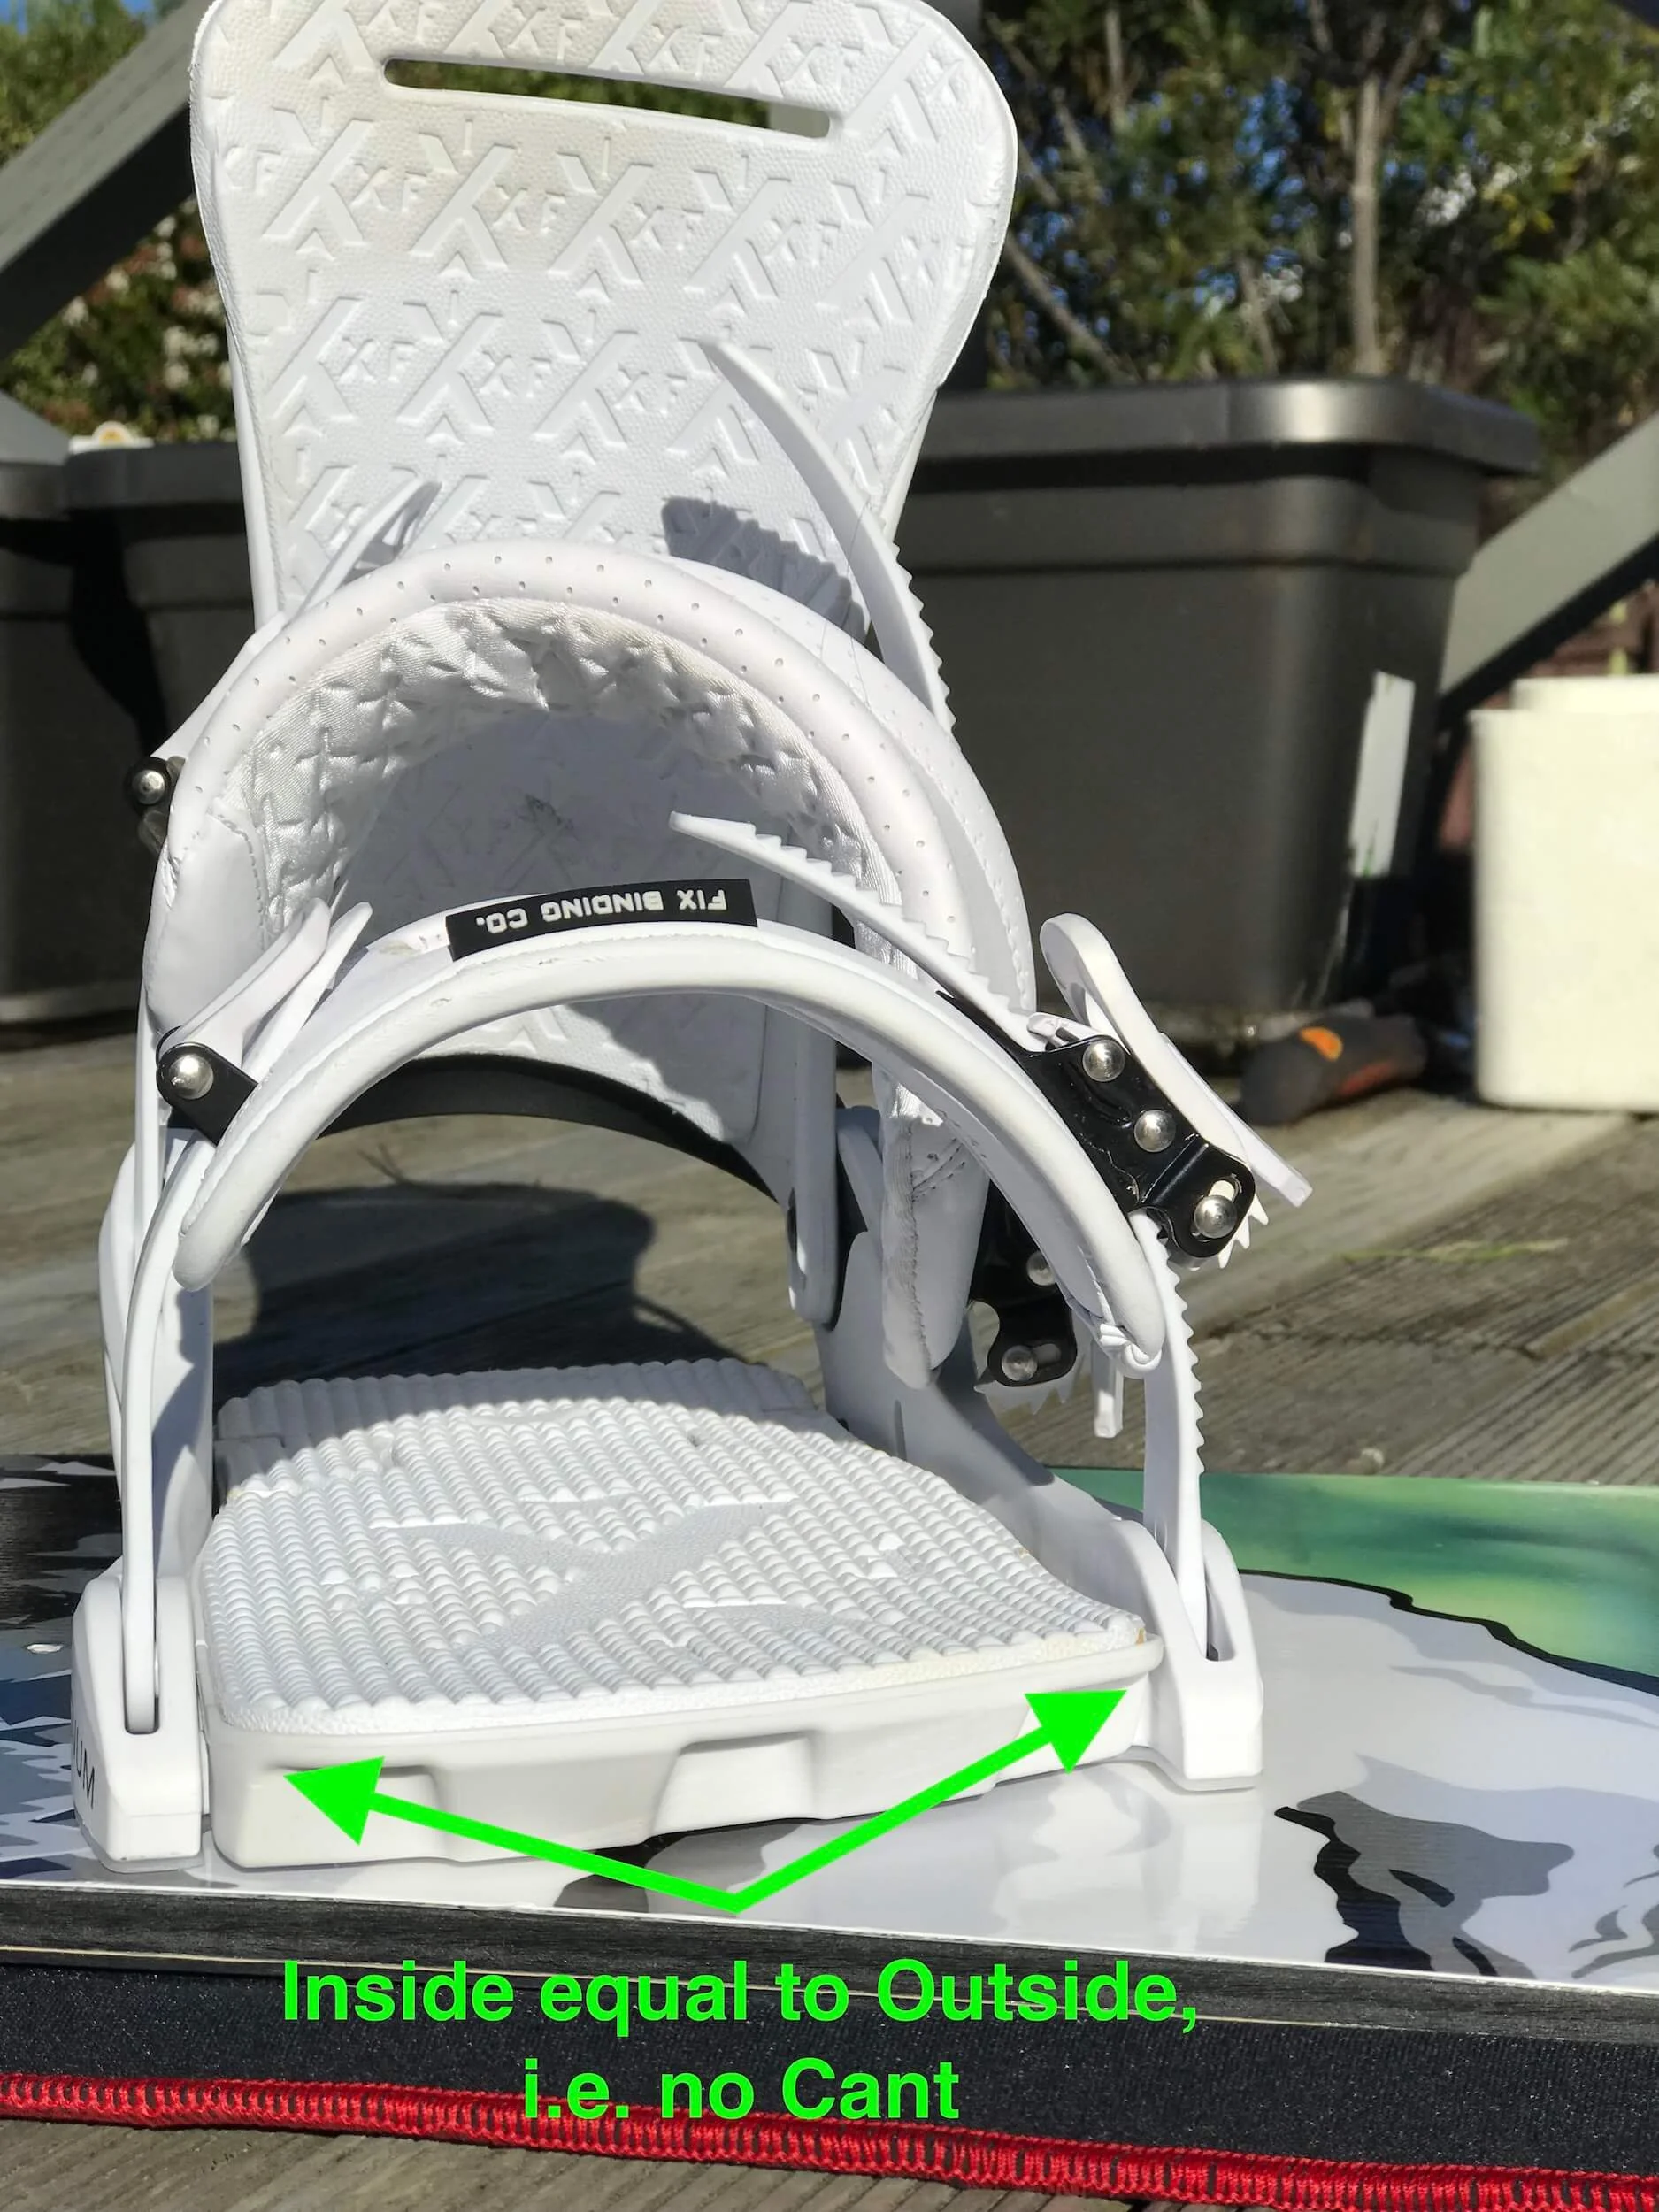
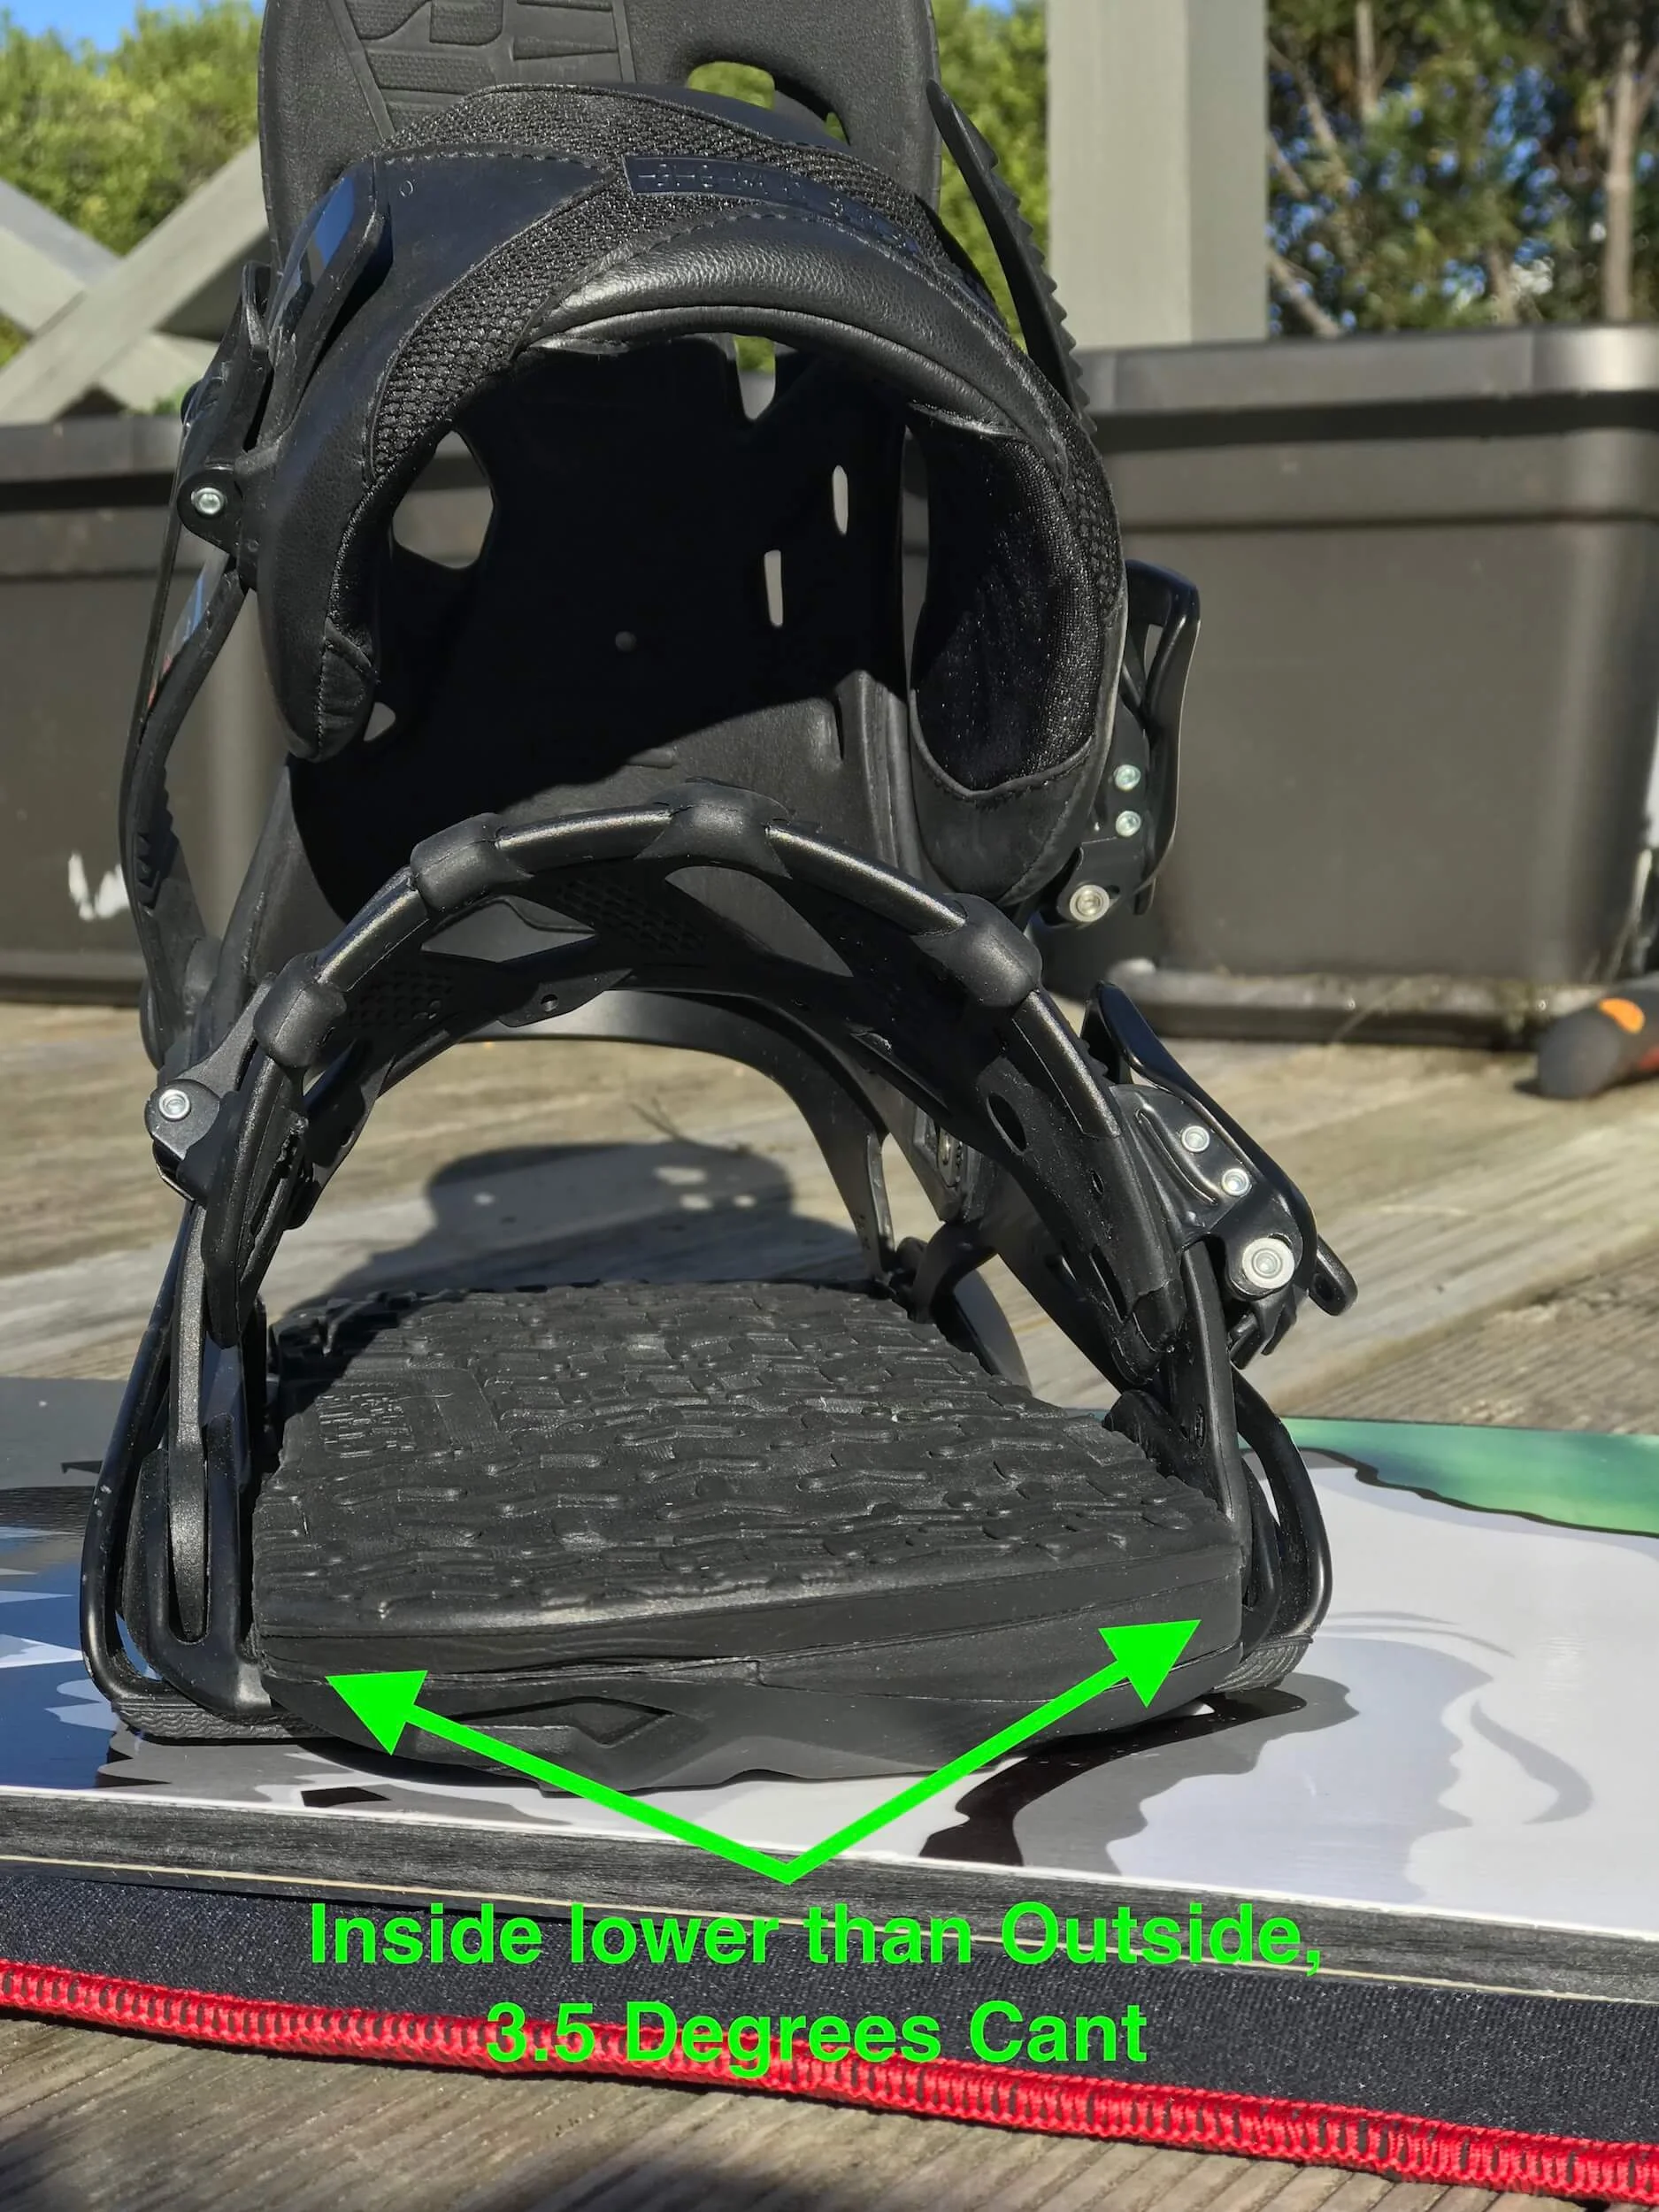
Some bindings offer cant in their footbeds, i.e. a footbed that is slightly sloped inwards, towards the insides of your foot. See photos above.
Cant can take some pressure off your knees.
I have some Rome bindings offering both flat and slightly canted footbeds and have played around with both but haven’t noticed a big difference between the two.
Your stance and binding setup can make the difference between an enjoyable day on the snow and a day you’d rather forget. Even though there are a bunch of settings you can play around with, as you can see it’s not rocket science. You should be able to sus out a great setup in no time.
And once you’ve got the ideal setup, it doesn’t need any major changes. I’ve run my current setup now for around 10 years and I really only tweak the setback (on powder days) or the rear binding angle depending on the conditions. Apart from that, everything else has been pretty constant.
Do you have any questions regarding setting up your snowboard bindings? Or do you have a favourite setup or any advice you’d like to share? If so, please leave a comment below!
Mick
Save this for later on Pinterest!
Mick is a lover of speed runs and hitting every feature on the mountain. Ex road bike and motocross racer with plans to dabble in mountain bike racing. Spends a lot of time looking at fast cars and bikes. Jen’s instagram model and selfie camera holder due to long arms. Sometimes an optometrist.


